Hold On Tight!

Thursday, 31 March 2011

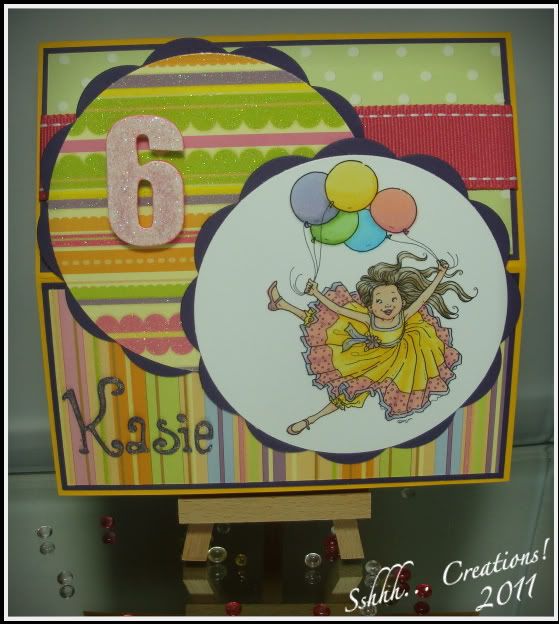
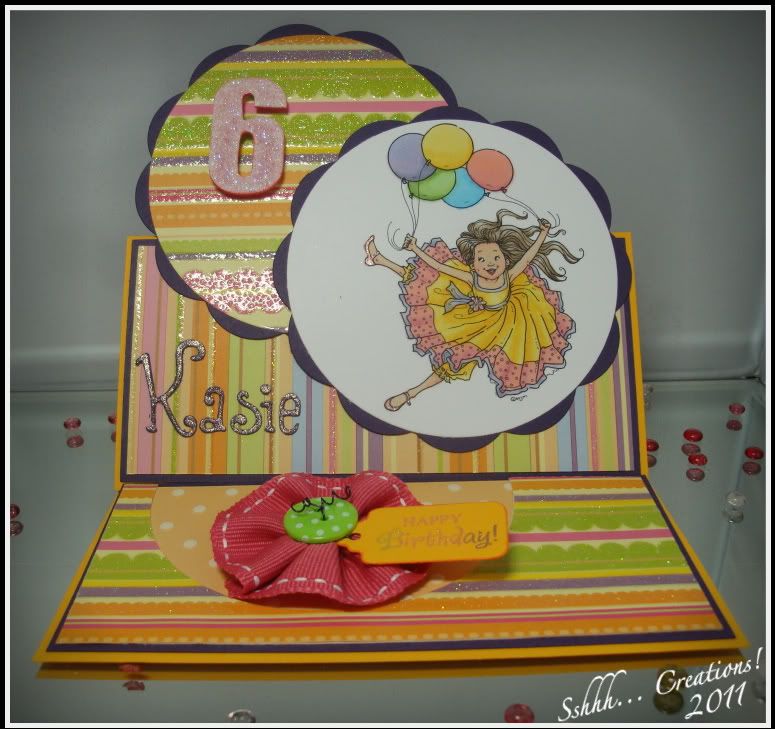
I was asked to make a card for a 6 year old girl – that has to be the easiest age group and gender to make a card for, so it didn’t take long to come up with this

Photobucket

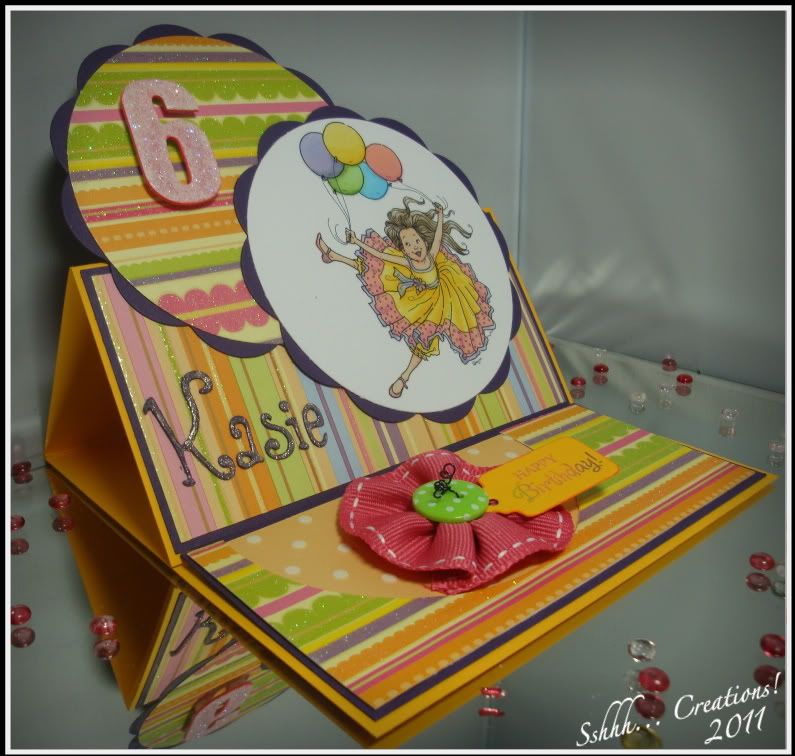
Which is an easel card

Photobucket

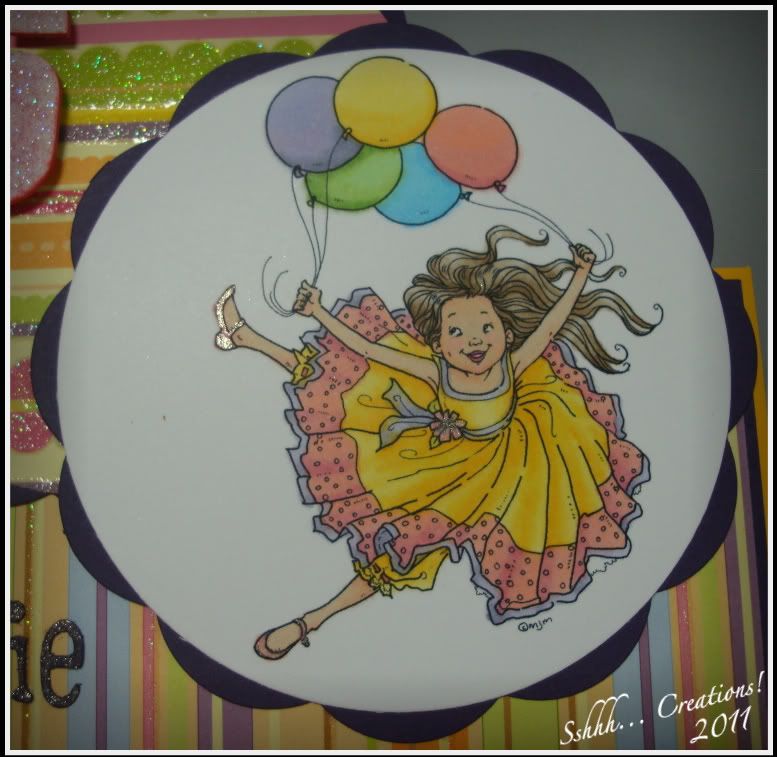
I used this fabby image from Mo’s Digital Pencil which I coloured with copics and I gave her some shiny shoes and accessories with a clear stardust pen.

Photobucket

The papers are DCWV Nana’s kids. I glittered a chipboard 6 with some soft pink glitter and attached it with foam pads to lift it out a bit. I used a sizzix die to cut the lettering for the name, which I also used the stardust pen on. The circles were cut with nesties.

Photobucket

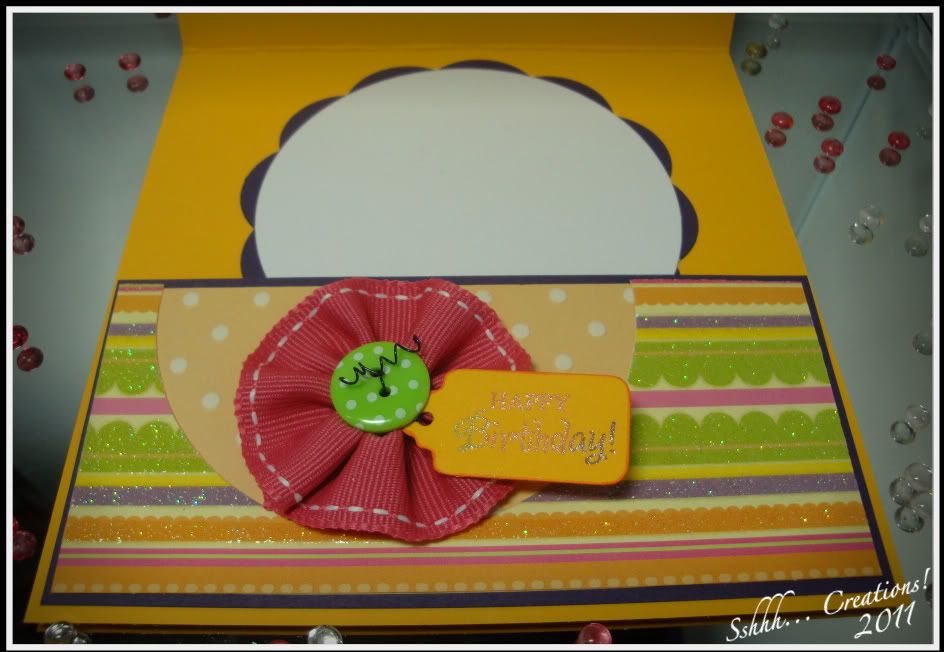
On the inside, I used the piece of dp that I cut the circle out of for the front to make a panel, and then made a flower out of some Stampin’ Up! ribbon. I used a cute wee button from Crafty Ribbons. I attached a tag with some purple wire. The Happy Birthday is a Wild Rose Studio sentiment stamp.

Photobucket

This card fits the following challenges:

Alphabet Challenge Blog; U for Up in the air

Totally Papercrafts Challenge; Cute and cuddly

Mo’s Digital Challenge; Buttons and Bows

Thanks for dropping by!


Photobucket

WOYWW

Wednesday, 30 March 2011

It’s been quite a while since I joined in with WOYWW, and every week I mean to participate but I only remember when I get to work and have a sneaky peek at a couple of blogs.

So when I got home tonight, I figured, it’s still Wednesday, I might as well do it now!

And boy did I pick a good week to join in!

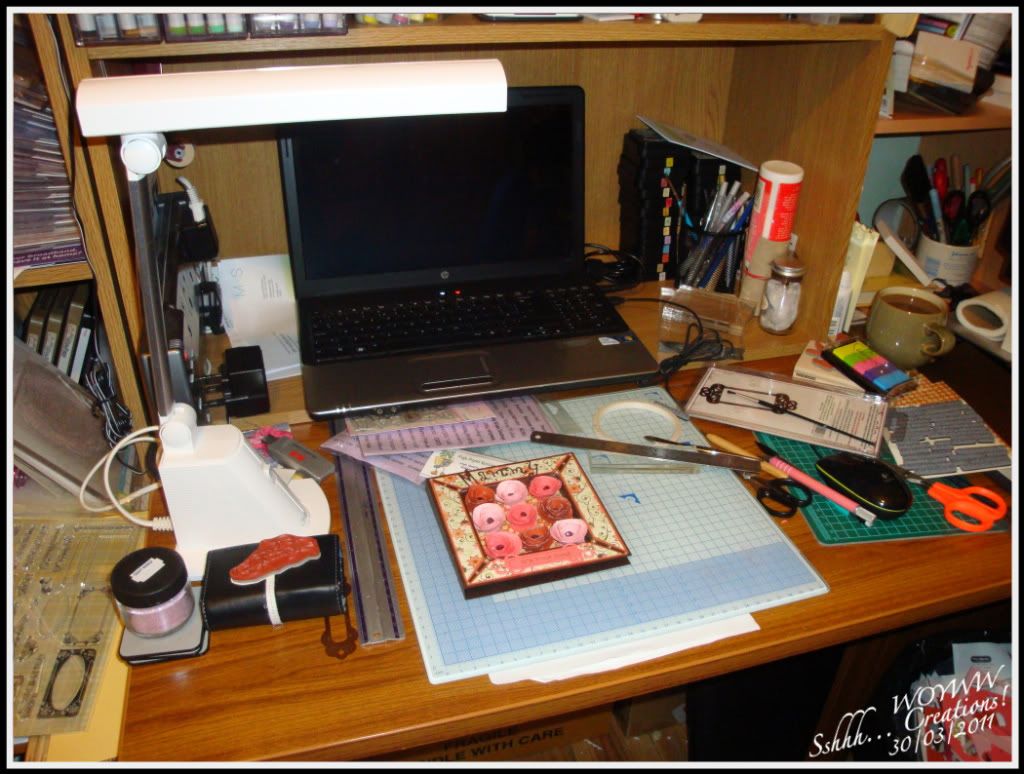
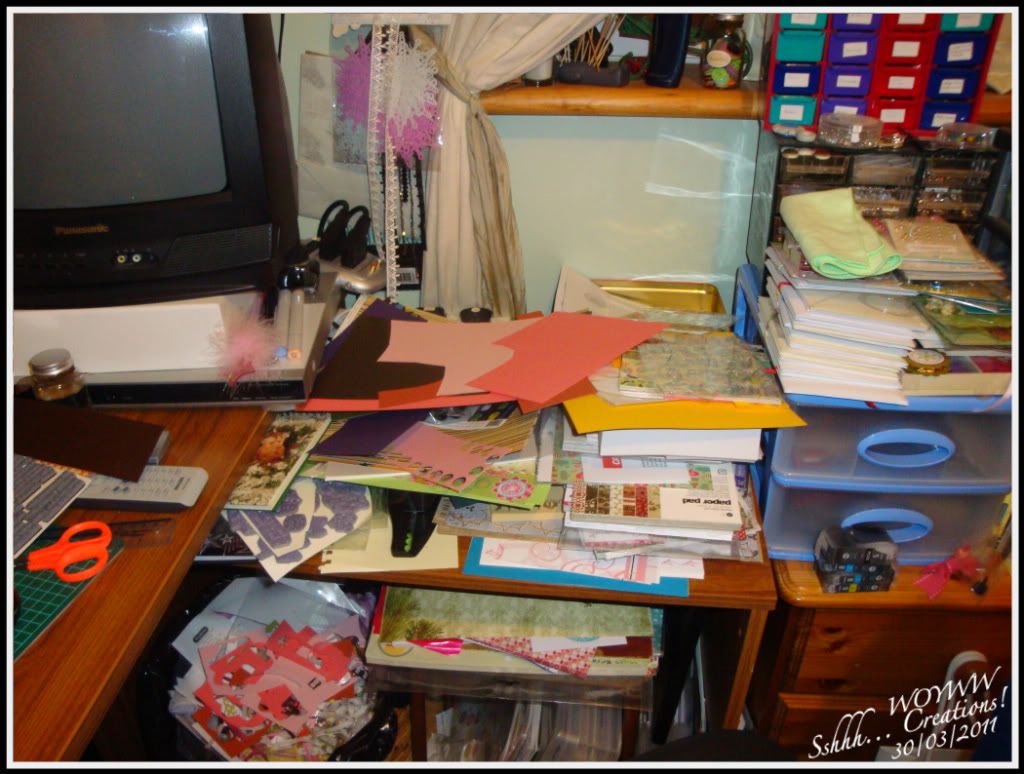
Just look at the state of this!!

Photobucket

As you can see, I’ve been busy! My mother’s day card is sitting on my cutting mat waiting to get the inside decorated, and there’s various bits of debris from that card and a few others.

You thought that was bad, just wait until you see this!!

Photobucket

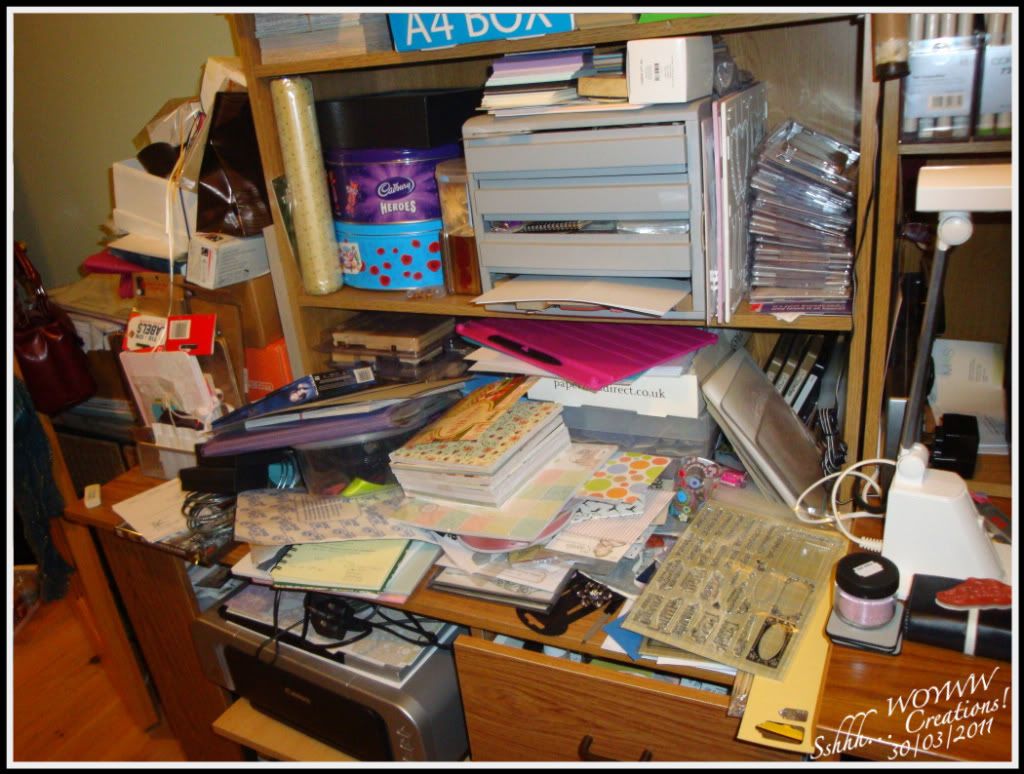
Er... I don’t really know where to start in this one!! This the the smaller desk beside the one I work on and it’s where I dump everything that I’ve either used, yet to use or don’t know what to do with! Lol

There’s also a few new stamps in under the pile of “stuff” that I need to mount and catalogue (see I can think about being organised!)

The eagle-eyed may spot a dvd box set of season 1 of Buffy the Vampire Slayer! I’ve had that box set for the best part of a decade and had never actually watched it (I had watch the series on TV) so I watched it while I was making cards! I’ve come to the conclusion that TV series are good to “watch” while making cards, so I’m on to series 2 now!

I’ll also point out that the 2 boxes of sweets wouldn’t actually give you any kind of sugar rush – they’re full of buttons and beads!

And finally, the pièce de résistance...

Photobucket

My other little desk/dumping area which is covered in all kinds of papers that I’ve used some of or have kept out to use. A few more stamps and punches and that’s your lot!

Why is it that the smaller the desk, the bigger the mess??!

Hopefully I’ll remember to join in a little earlier next week and hopefully it’ll be a nice tidy desk that no-one will recognise – including me!!

I think I’ll pop over to Julia’s Stamping Ground to check out and see if my desk is in fact the most untidy, or if I just blend in with the rest!

Thanks for dropping by!


Photobucket

Boho-Chic Wedding

Saturday, 26 March 2011

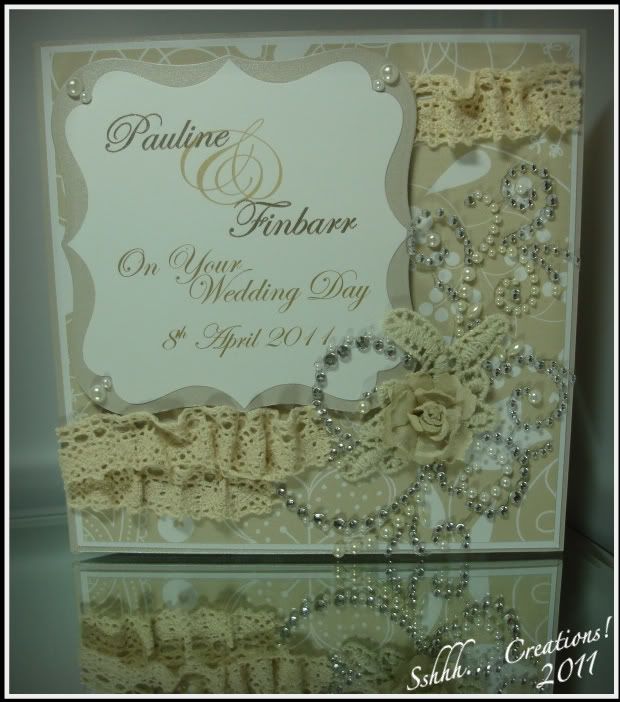
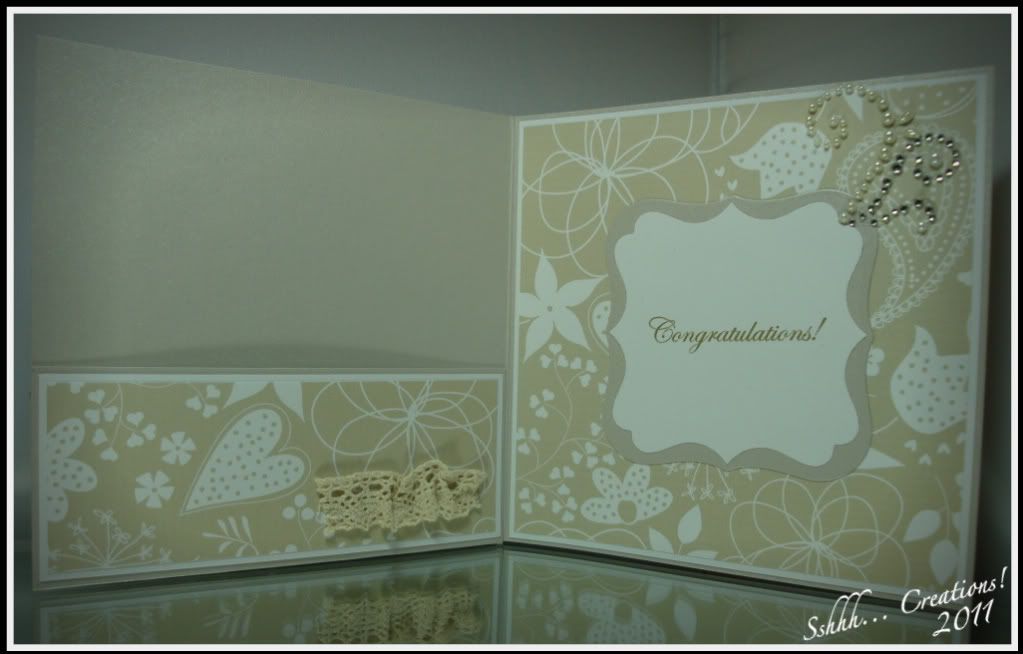
I was shopping one day with my mum and came across a craft shop, needless to say we went in and spent a fortune! And while we were there, my mum spotted those diamante swirls with the flower built into it (that I would never buy cos they’re too expensive!) and she said she’d buy it if I made a card with it for an upcoming wedding that she’s going to. I jumped at the chance as I think they are gorgeous!

So this is the card I made

Photobucket

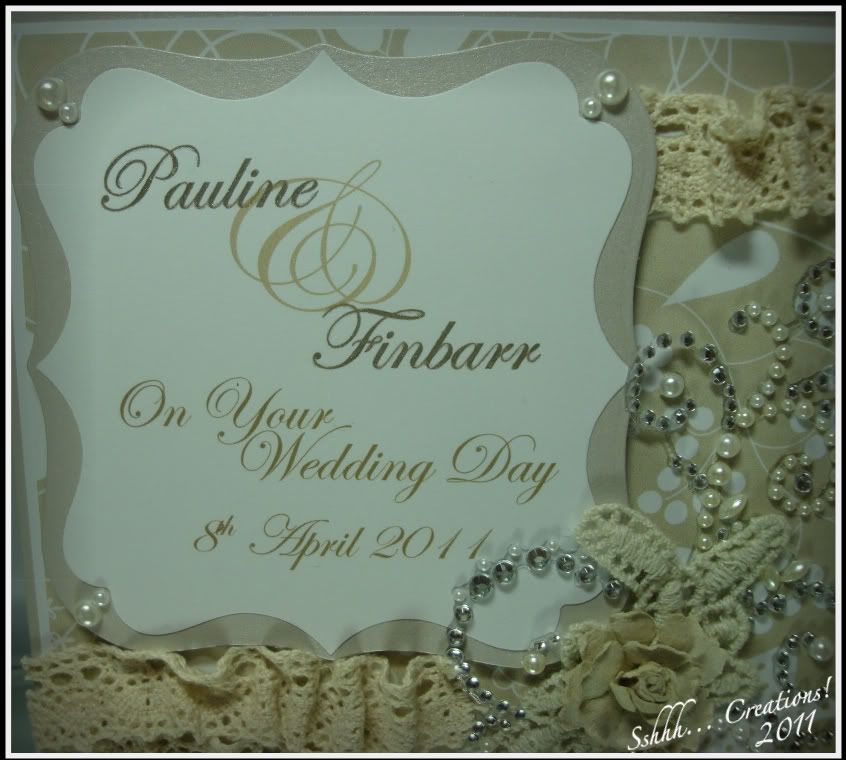
My mum likes cards to be personalised, so instead of an image (which I don’t think would’ve looked right with the swirl) I used the bride and grooms names as the focal point.

Photobucket

I thought the swirl was pretty enough without overloading the card with an overpowering paper, although I knew I'd also be using it where there would be less detail, so I used a Pink Petticoat download paper – Pretty Doodles.

Photobucket

I added a pocket to the inside for the gift and matched the sentiment space to the front. The swirl was a little big for the front of the card so the bits I cut off didn’t go to waste and I used them on the inside.

Photobucket

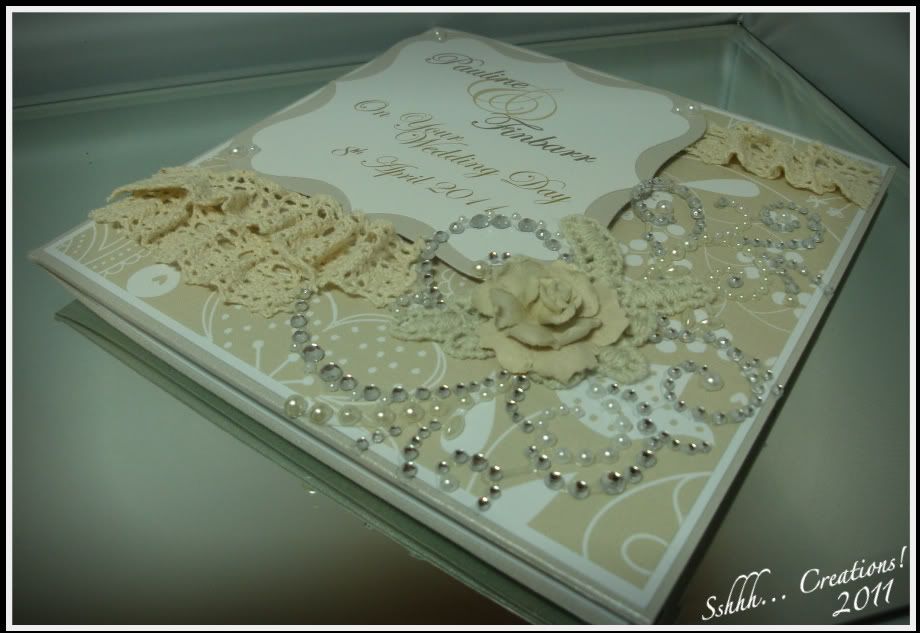
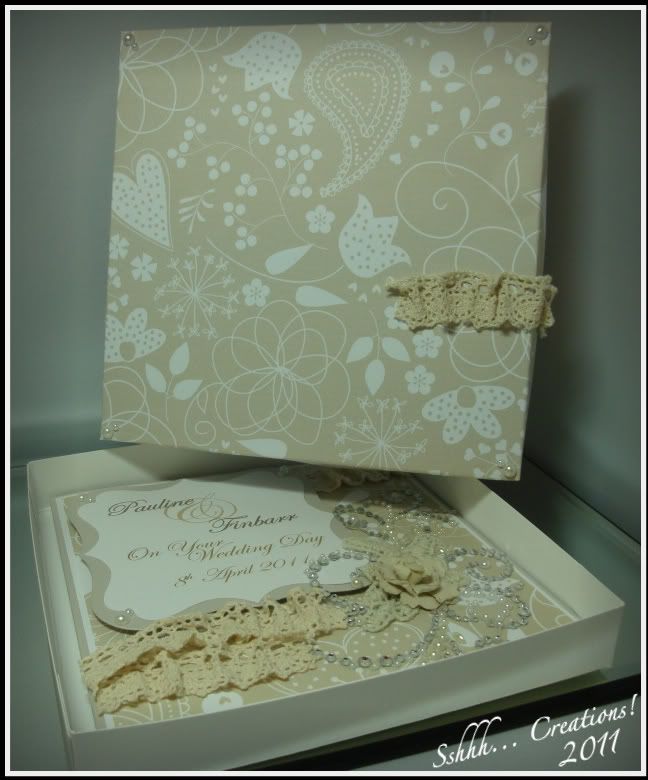
I then made a box, printing the same PP paper onto card. I added some pearls from Wild Orchid crafts to the corners to match the card and also used up the last of the lace that I used on the card (which my brother says reminds him of a garter!) on the lid also.

Photobucket

This card fits the following challenges:

Crafty Catz Weekly Challenge; Pearls & Swirls

Simon Says Challenge; Mother’s Day/Girlie – I thought it was quite a girlie card!

Scrappy Frogs Challenge Blog; Flowers and Lace

Simon Says Stamp & Show; Show a Word.

The Shabby Tearoom; Bingo - Gems, flower & Die-cut

Cupcake Craft Challenges; Monochromatic

Thanks for dropping by!


Photobucket

Gift Bag Tutorial

Friday, 25 March 2011

*Warning* This is a really looooonnnnng post!!

I wanted a gift bag to match a card that I had made, and I wanted it to be a good sturdy bag, so this is how I made it...

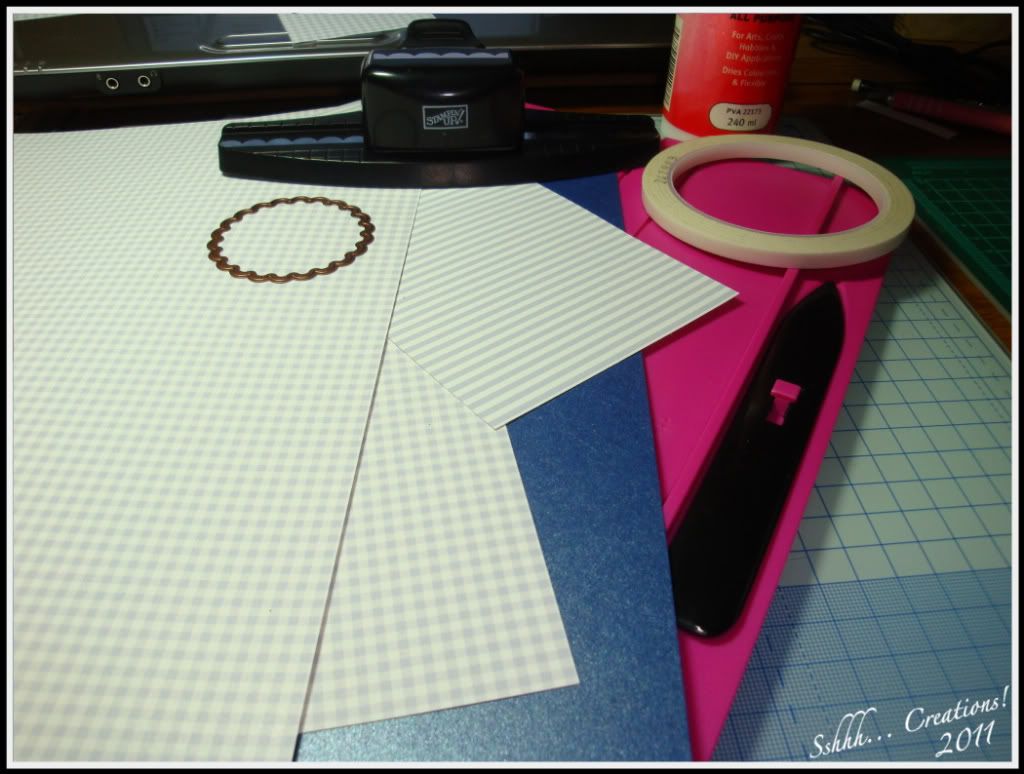
Materials
Photobucket


You will need:
2 A4 sheets of card for the basic bag - I've used Pink Petticoat, Gingham printed onto card.
some corresponding card for decoration
A scoring board
Adhesive - I use DS tape and a wet tacky glue.
Edge punch and scalloped circle nestie for decoration
Some ribbon and beads for handles

Making the bag...

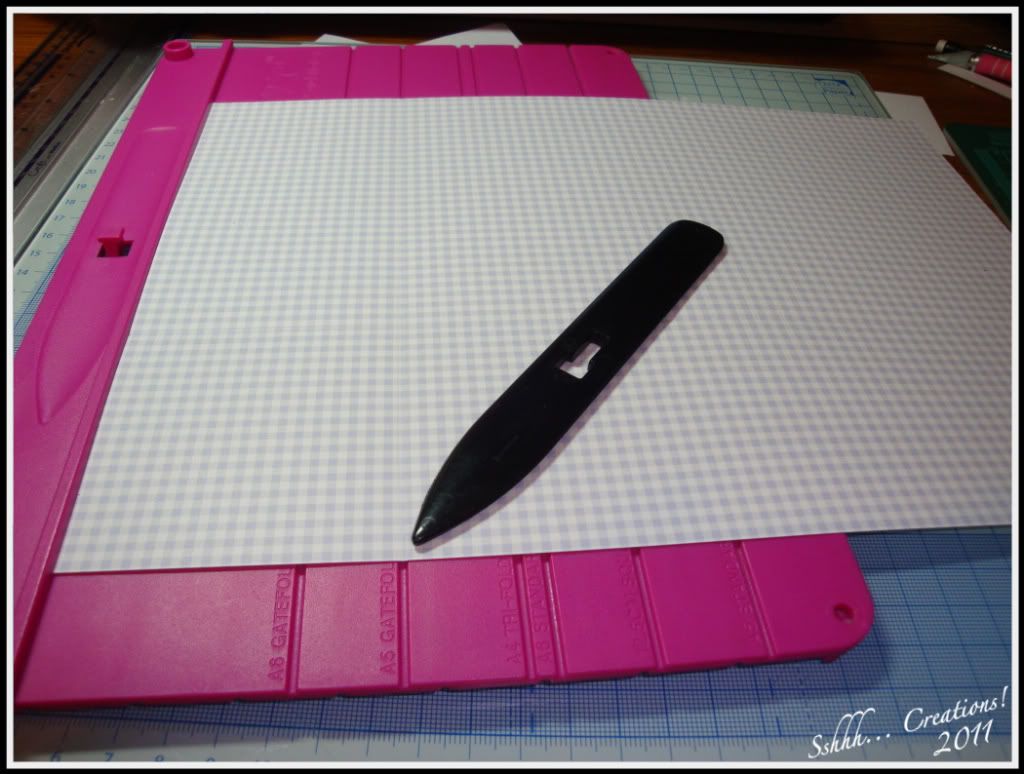
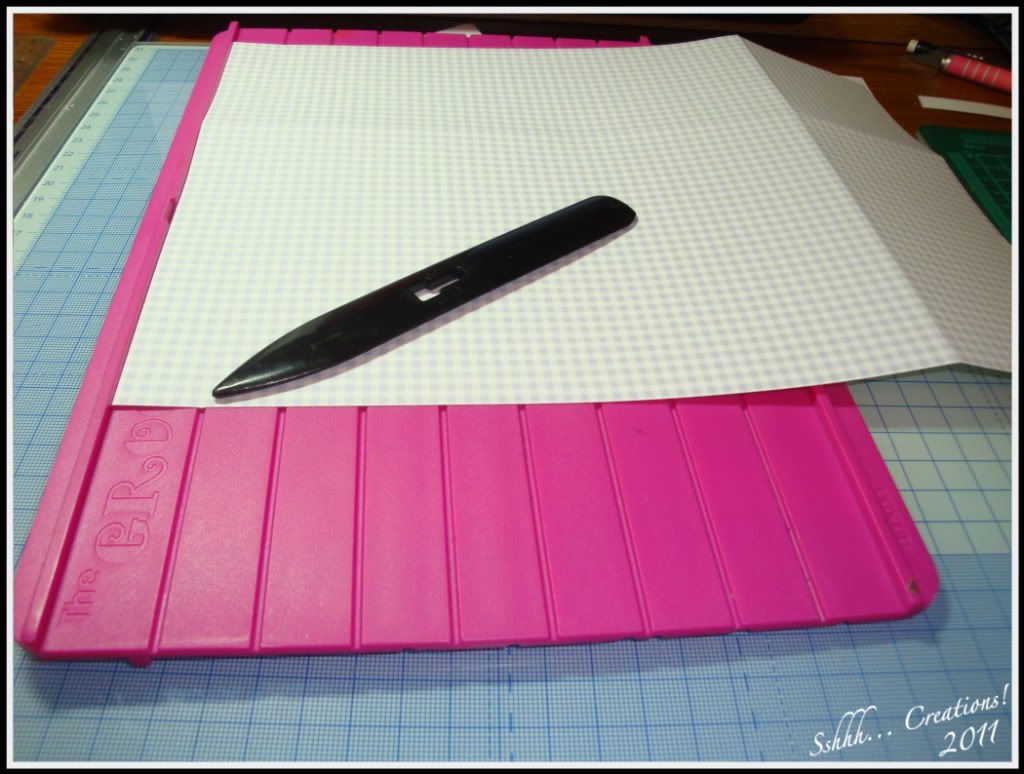
Taking the card you want for the base of the bag, score the length and left side at the A5 gatefold mark (2 15/16" or 7.4cm)
Photobucket

I then scored the right side on the first line of the “box base” on the back of the board which is 7/8” or 2.2cm
Photobucket

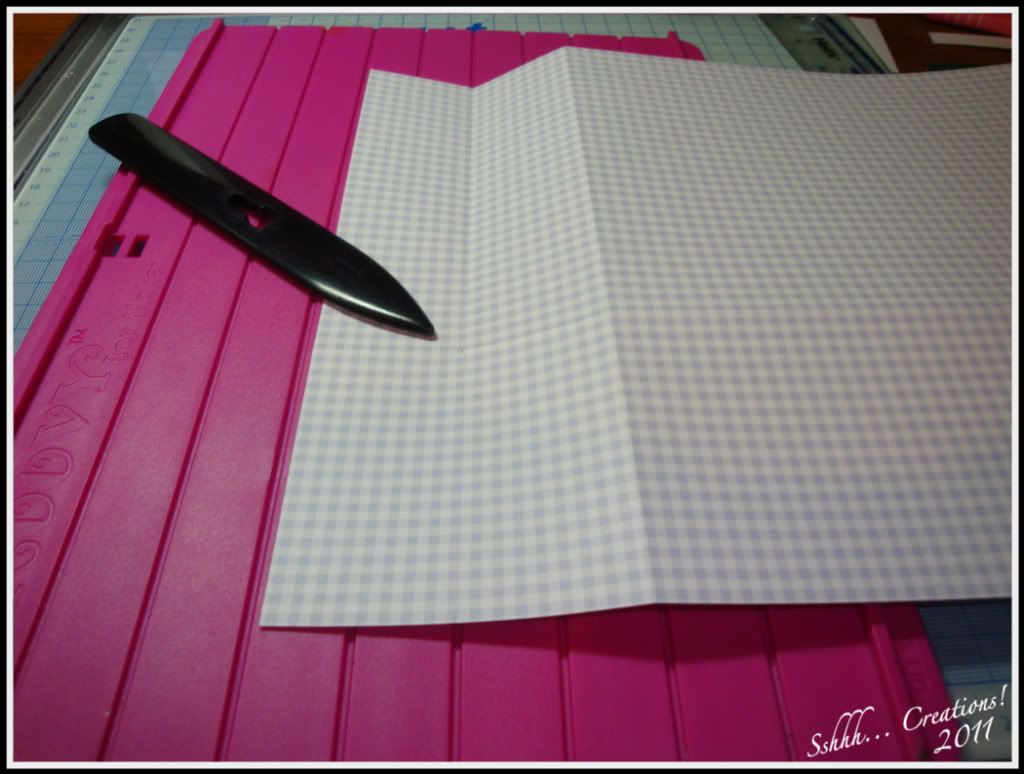
Fold all the score lines

Find the centre of the left section (1 7/16” or 3.7cm) mark discretely & score from the top of the card to the score mark. Fold this line from the top until near the bottom – this line is to ensure the bag closes at the top and helps it to look more like a bag than a box!
Photobucket

Repeat all score lines on your second sheet making sure they are on the same side of the sheet.

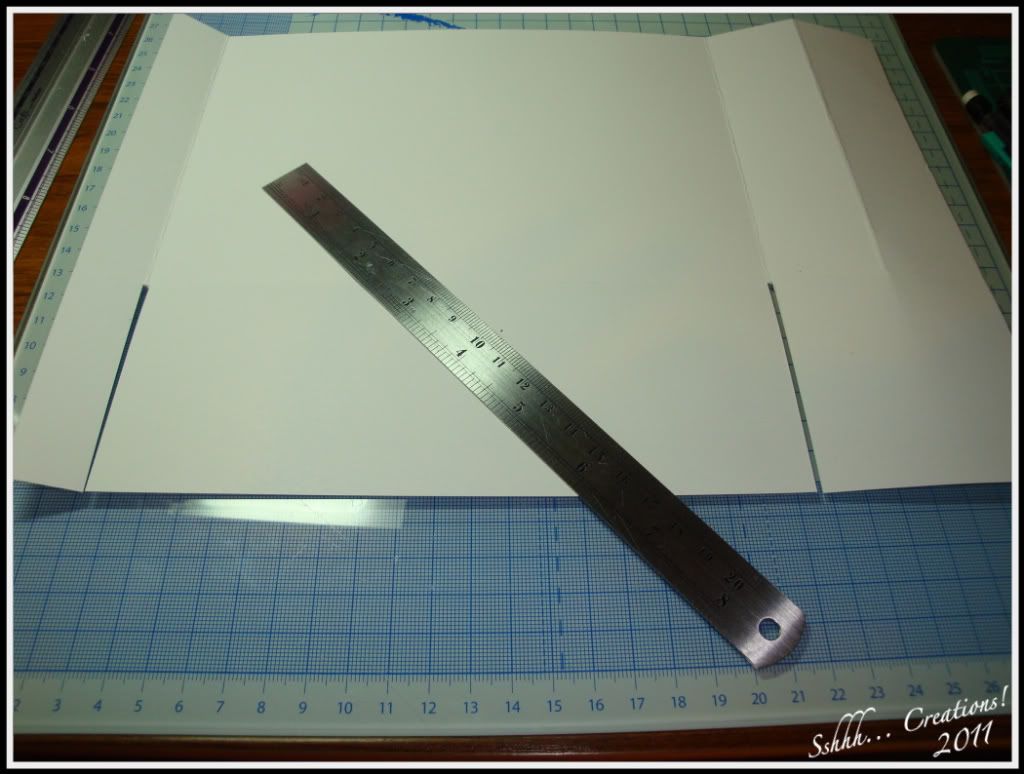
Take one of your sheets and cut to make a tab – it makes it much easier later if you cut a notch out by cutting either side of the score line.
Photobucket

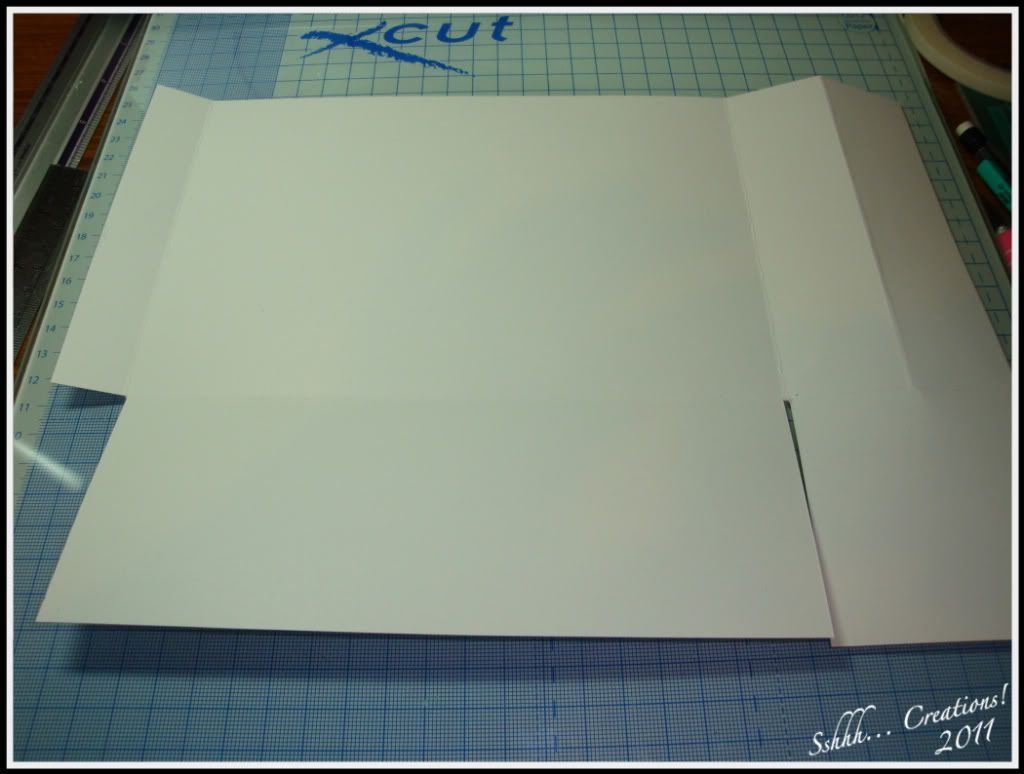
Repeat on your second sheet but completely remove the smaller tab
Photobucket

Measure where you wish the holes to go for handles. I find the easiest way is to measure the top front of the bag (which should be 20cm) and find the centre, mark equally to each side of the centre and a hole in the centre (I added the centre hole after I took the photo!)

Repeat the holes for the handles on the other sheet but instead of one hole in the centre, make two holes just either side of the centre

I punched the holes with my crop-a-dile. The holes can be re-inforced by sticking a circle of card where the holes will be and punching through both layers.
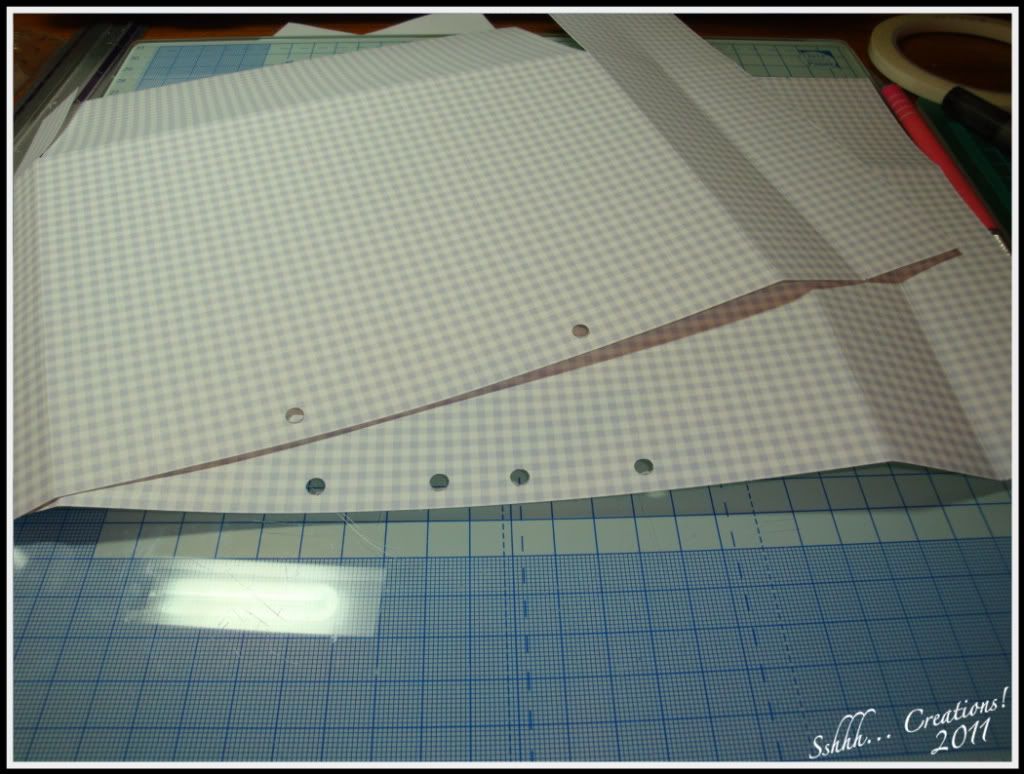
Photobucket

Now for the tricky bit

Apply DS tape on the patterned (outside) side of the sheet with the smallest tab removed, on the right section and on the smaller of the two remaining tabs.

On the other sheet (with the small tab) tape the white (inside) of the two smaller tabs and the patterned side of the right (small) section.
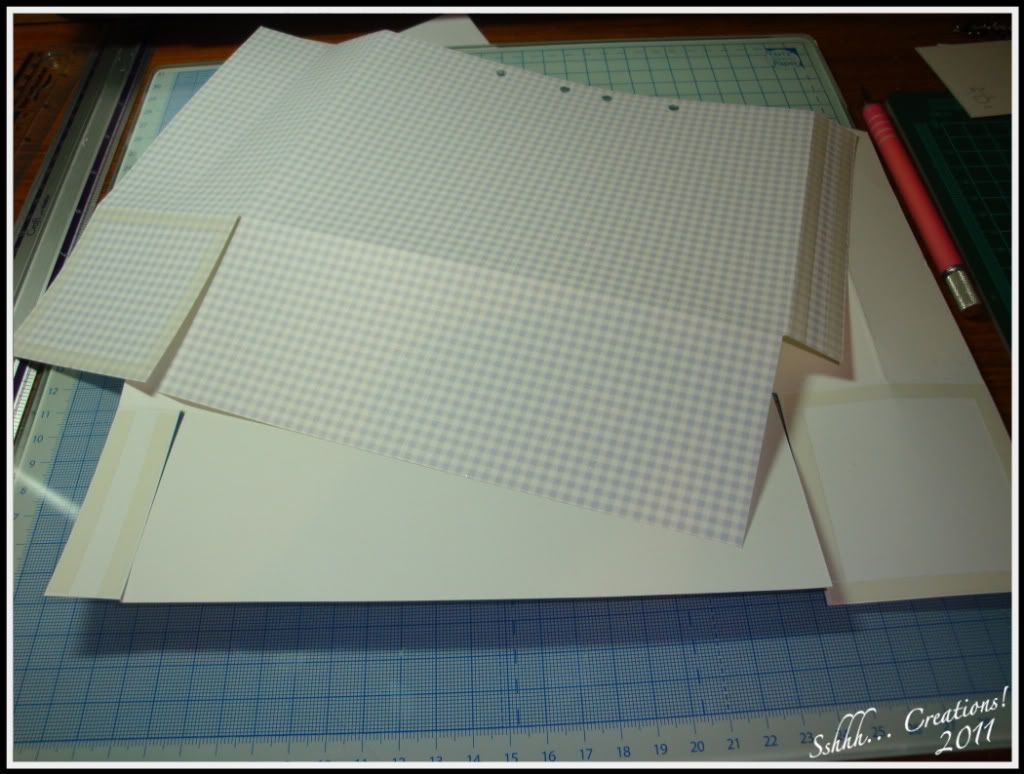
Photobucket

Stick the tabs to the larger tab adding the wet tacky glue for strength. Make sure to keep angles straight.
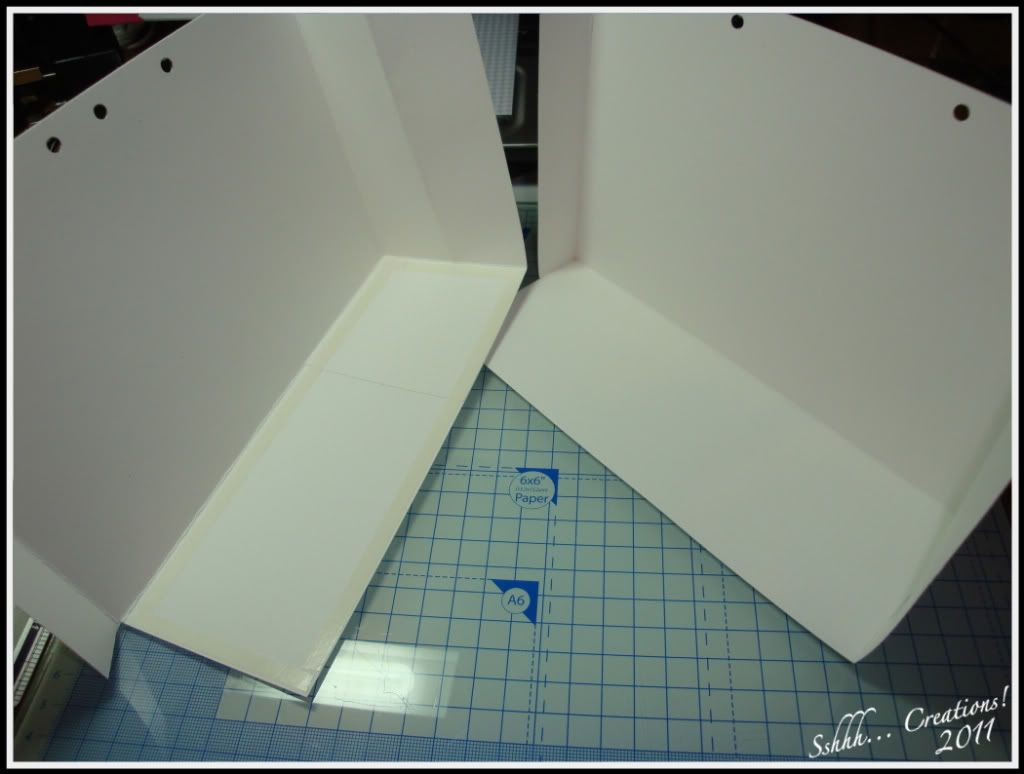
Photobucket

Add tape to the white side of the bottom of the piece with the small tab removed. Stick the other piece onto it keeping the side tabs to the inside of the bag and make sure you get right into the corners as close as possible. Again use wet glue as well as tape for strength.
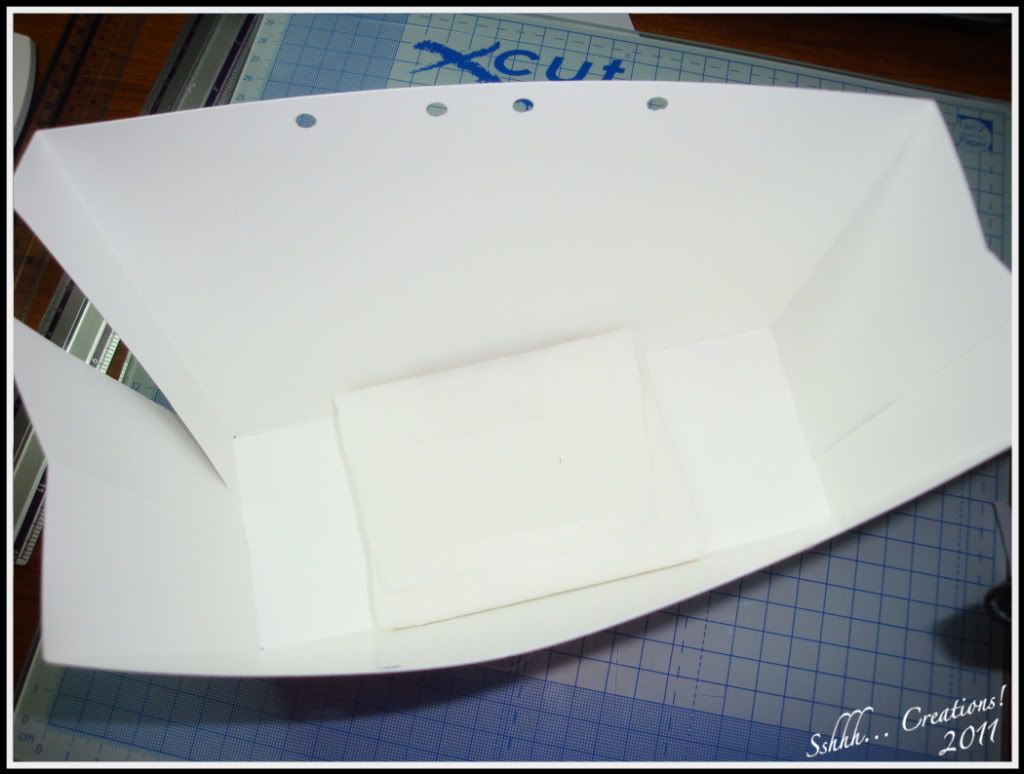
Photobucket

Run something heavyish over the bottom to make sure it’s all stuck down properly, I used an acrylic block (covered in kitchen paper – from previous experience of an inky block!)

Then attach the sides – don’t forget your wet glue!

And the base of your bag is finished!
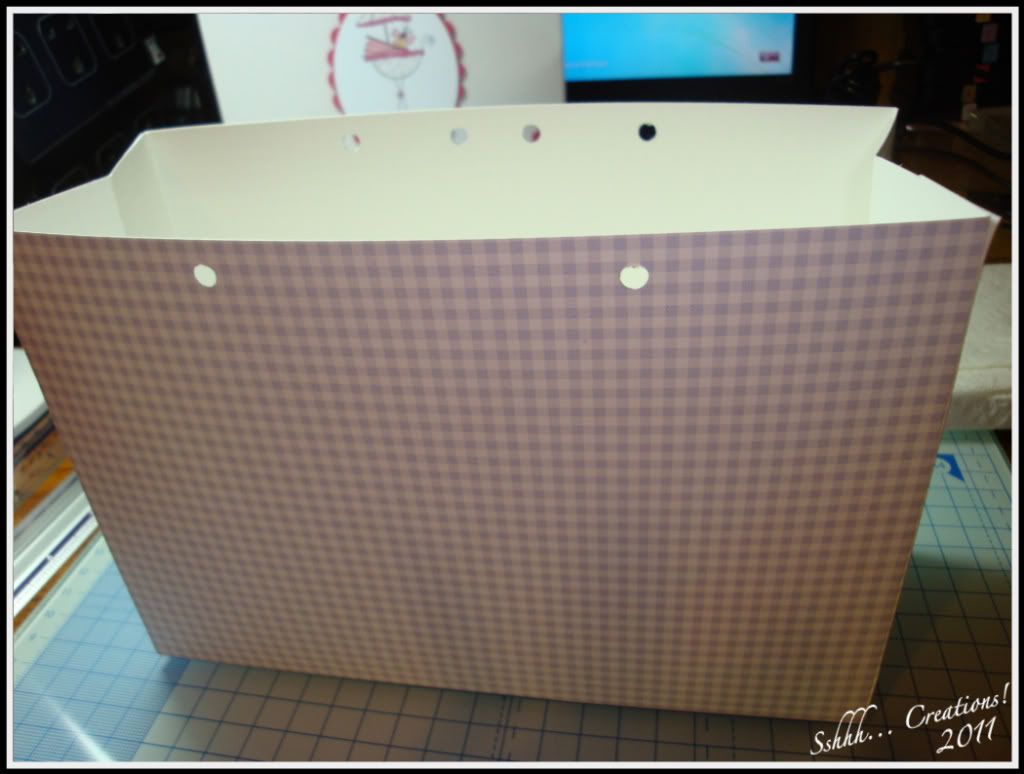
Photobucket

Now to decorate it...

Cut out four circles – I used the second smallest of the large scalloped circles nesties. You could use a punch or some of the labels can be lovely – as long as the shape can be quartered, it’ll work.
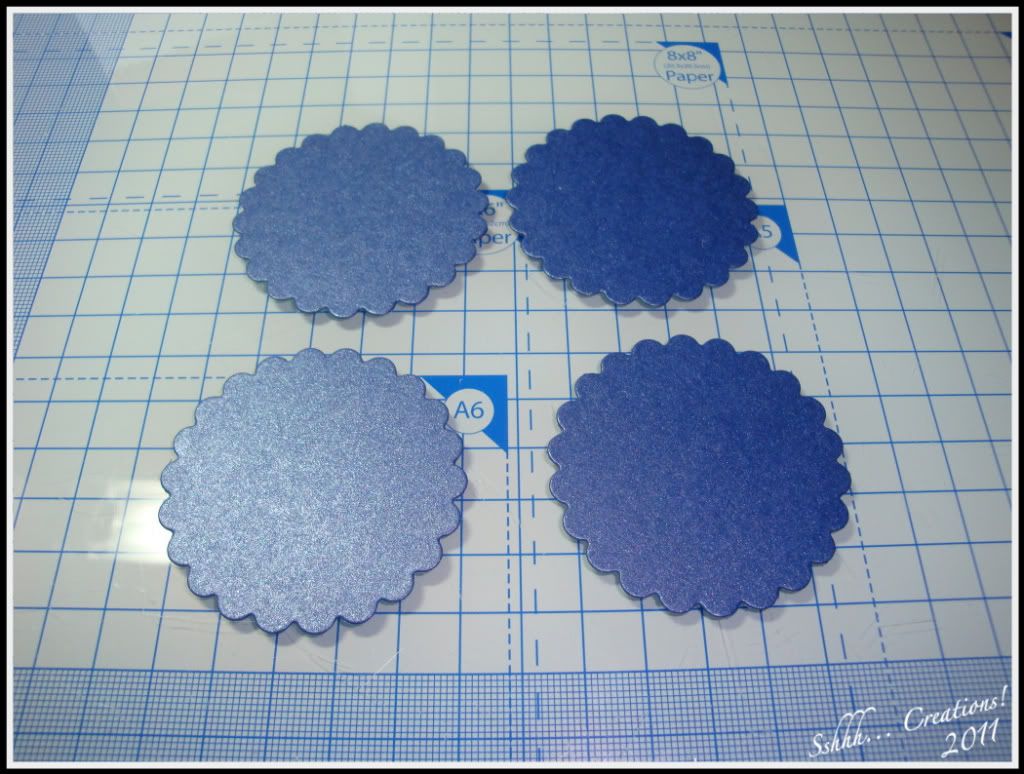
Photobucket

Score each circle into equal quarters and cut one of the score lines to the centre.

Apply tape and fold and stick one quarter over the other to create a corner shape.
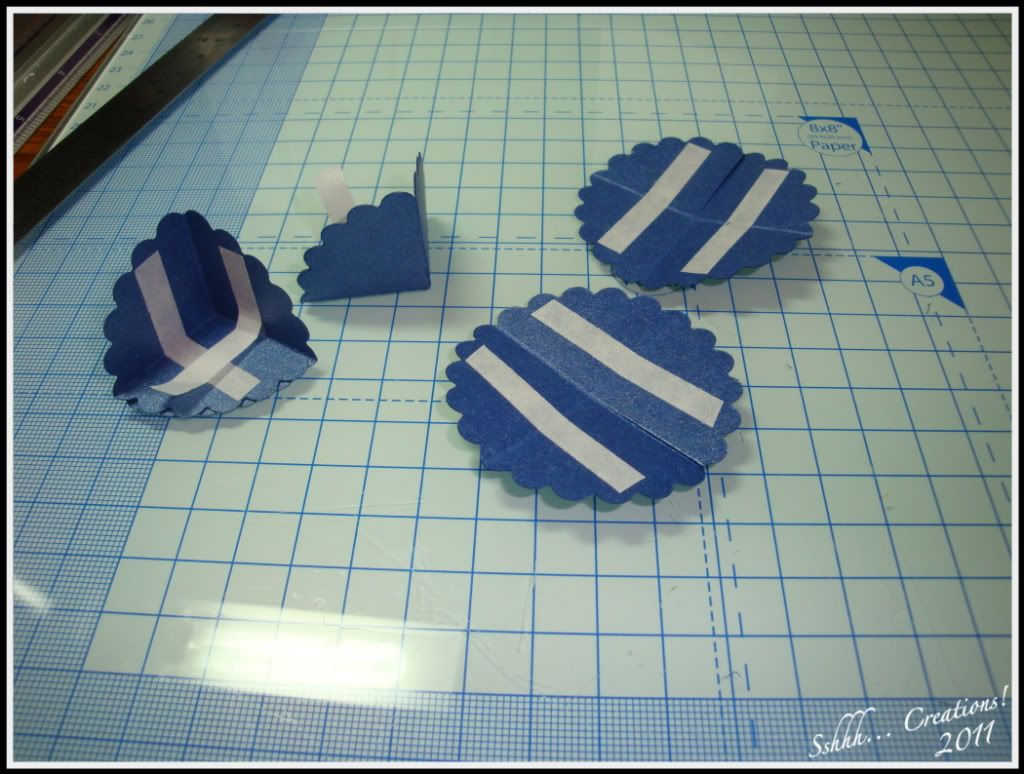
Photobucket

Attach the corners to the bottom of the bag. Make sure the double layer is at the bottom.
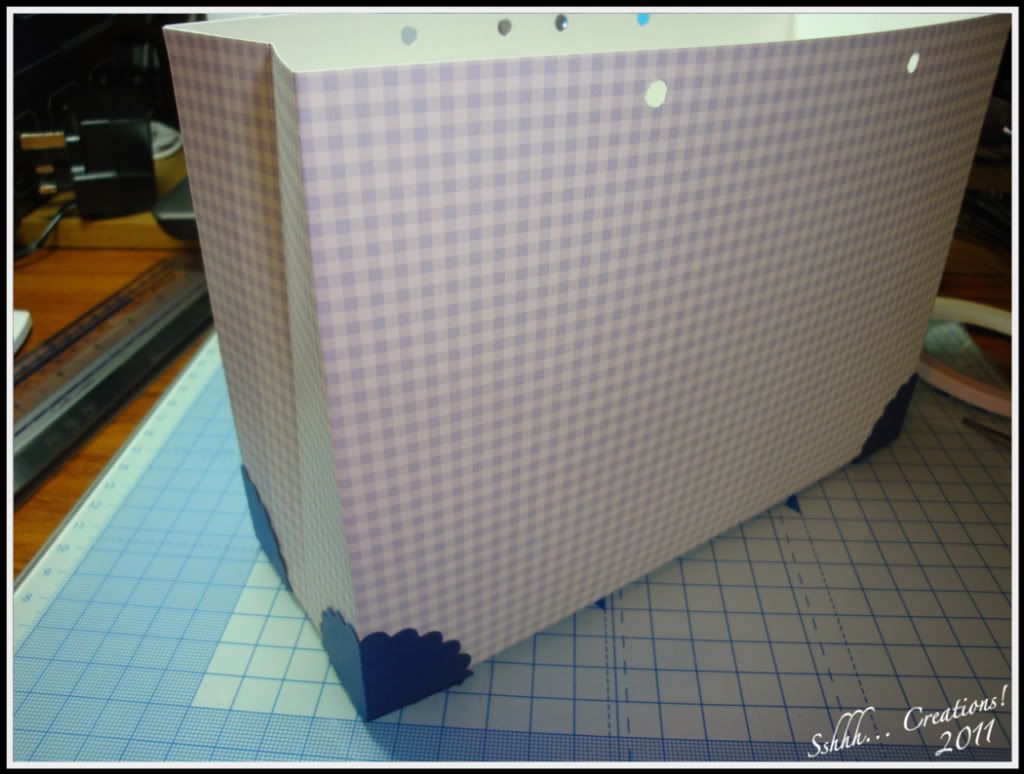
Photobucket

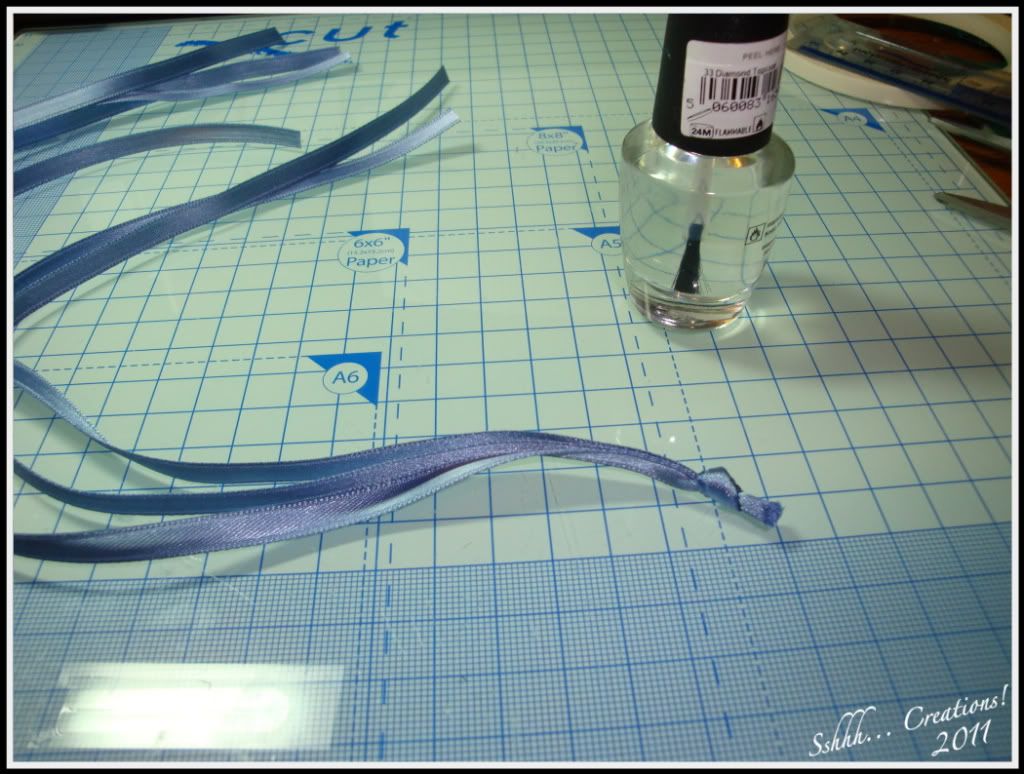
I’ve used ribbon for the handles, but I’m sure there are loads of other things that could be used. As this is quite narrow ribbon, I’ve used 3 lengths for each handle, so cut six 15” lengths of ribbon. Take three of the lengths and tie a knot at one end. I’ve painted a small amount of clear nail varnish over the ends to stop fraying.
Photobucket

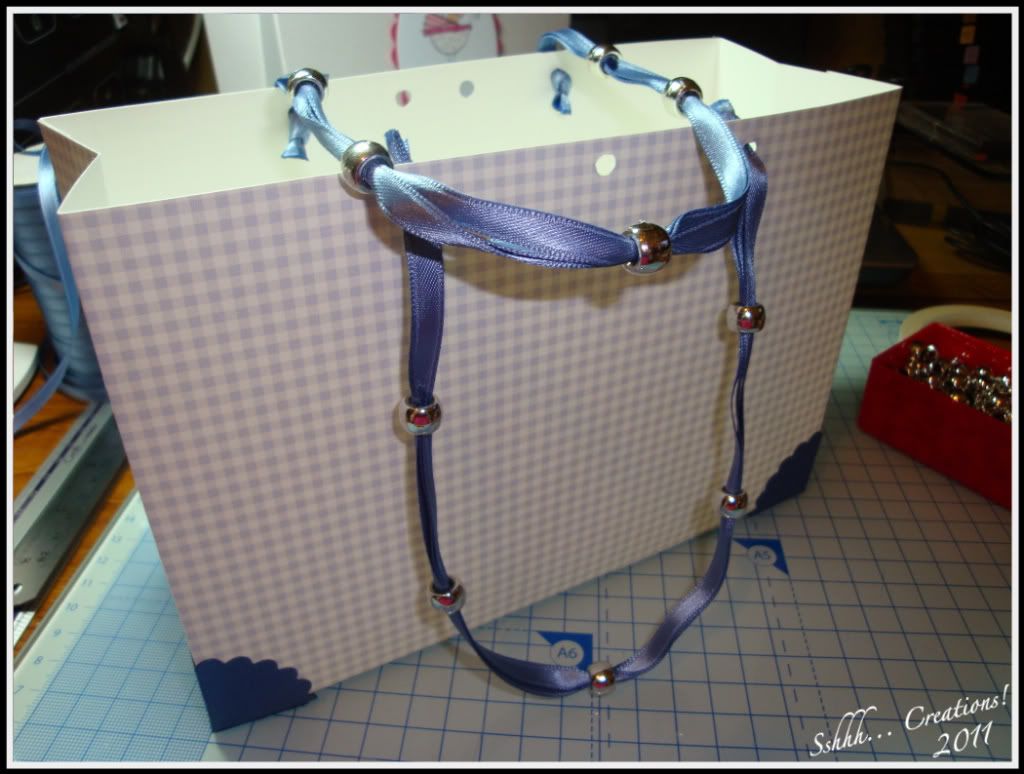
Thread your bunch through one of the outer holes from the inside of the bag to the outside. Then thread on some beads and feed back through the hole on the opposite side and tie and knot and apply nail varnish. Repeat with the other handle.
Photobucket

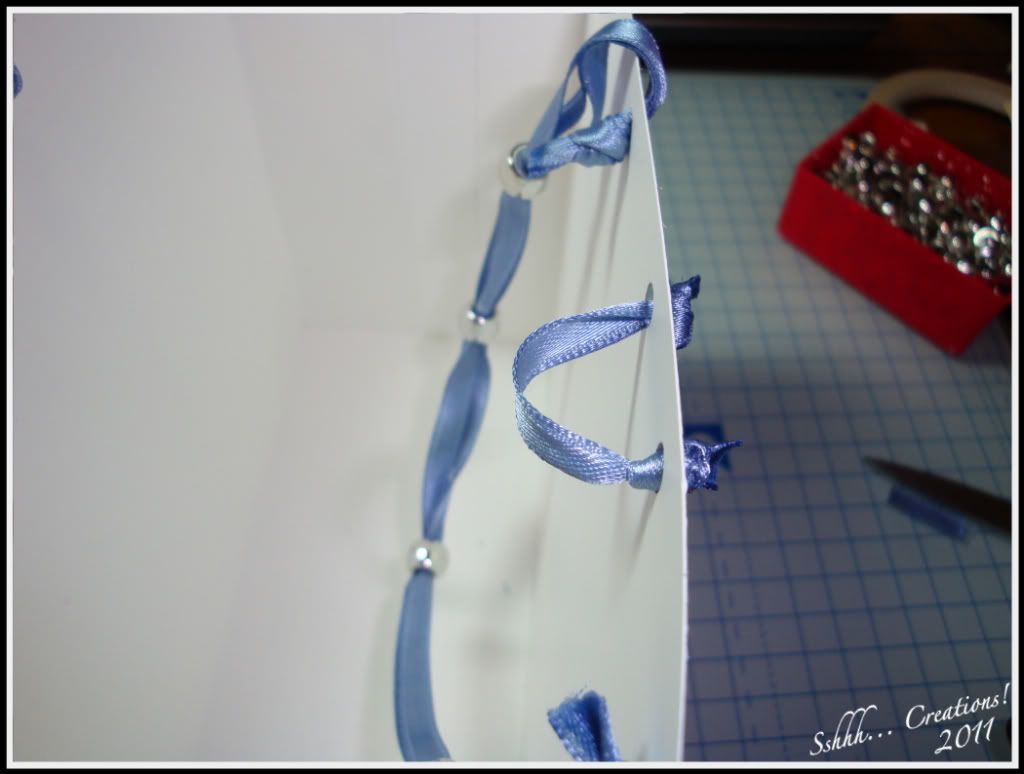
On the back of the bag, thread a small piece of ribbon through the two holes that were made just either side of the centre, knotting to the outside of the bag with the loop inside the bag.
Photobucket

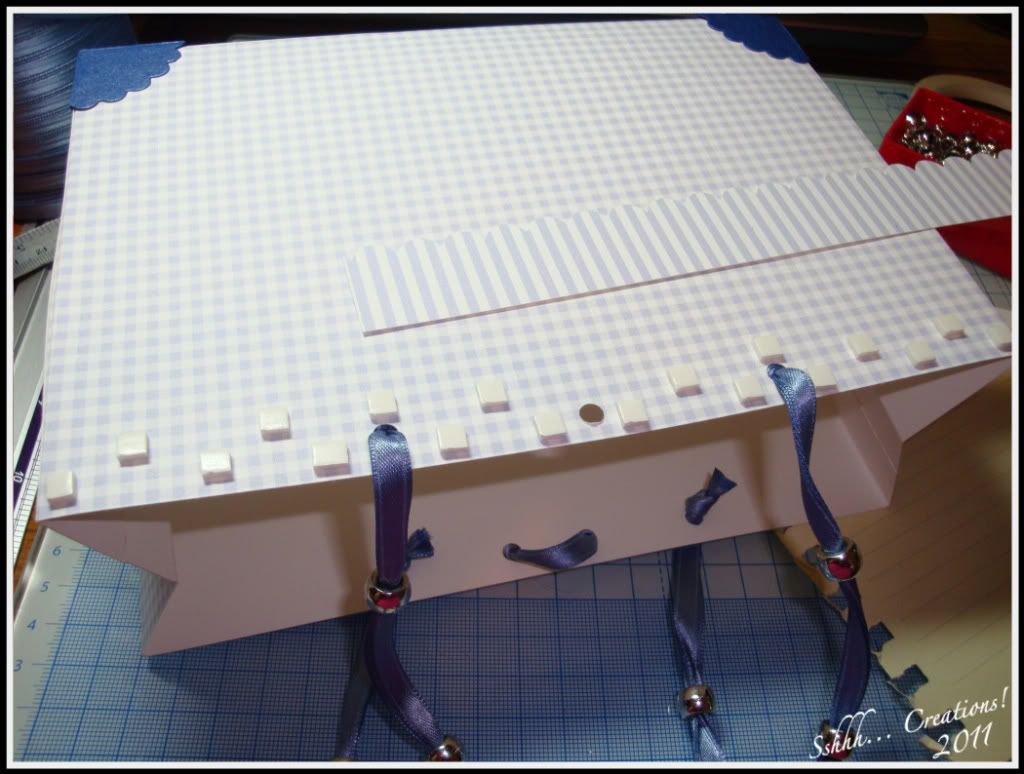
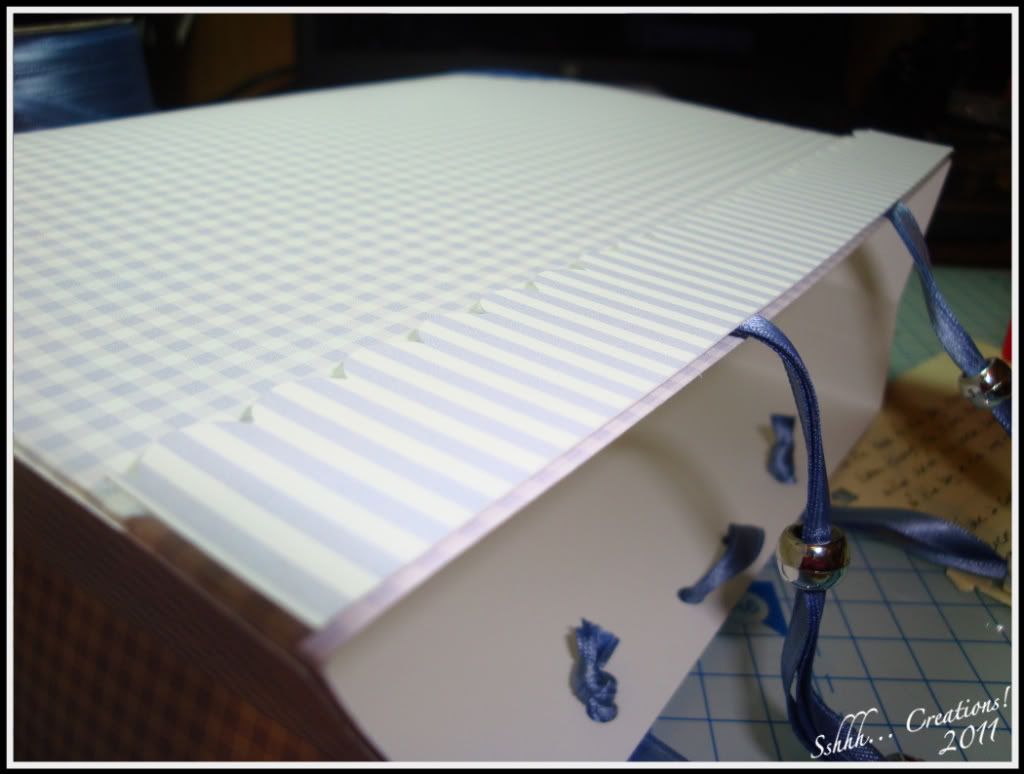
Take a contrasting piece of card and trim to 20cm across (ie the width of the bag). Use a fancy punch along the 20cm and trim to 2 - 3 cm. Make two pieces the same.

Attach to the top of the bag with foam pads. Apply the pads to the bag rather than the strip so you can avoid the ribbon etc on the bag.
Photobucket

Photobucket

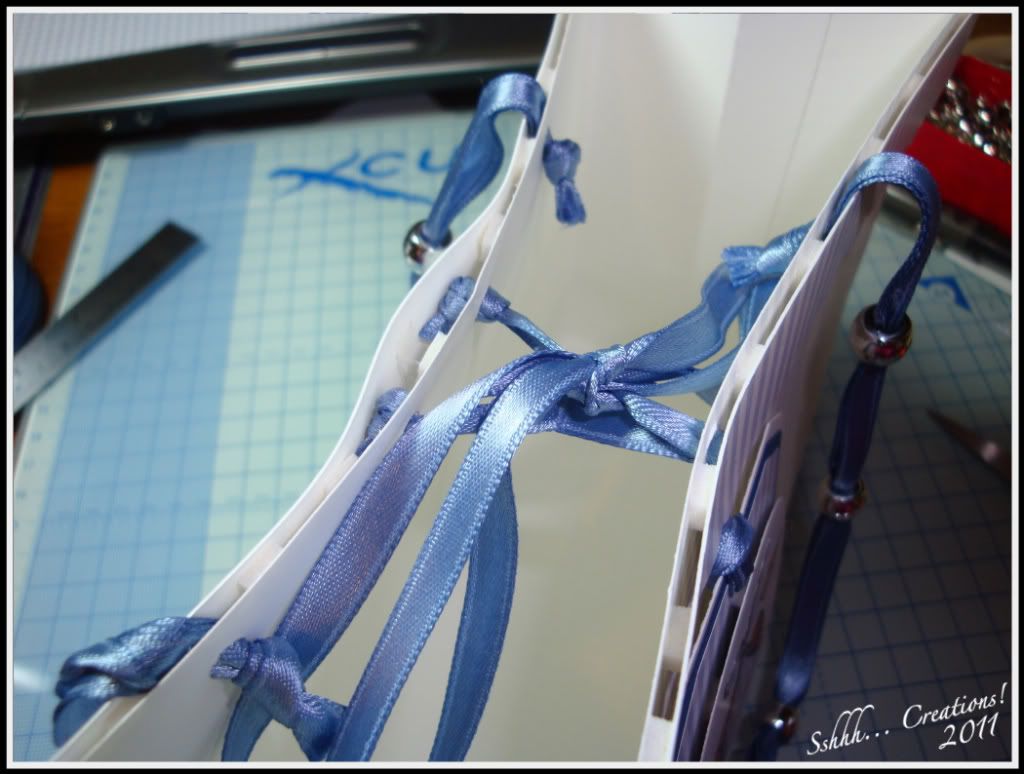
Last of all is to feed the ribbon attached to a previously made tag through the middle hole under the decorative strip to the inside of the bag. This can then be used to close the bag through the loop on the back. If you don’t want to use a tag then tie two pieces of ribbon in a knot at one side and thread through the hole in the same way.
Photobucket

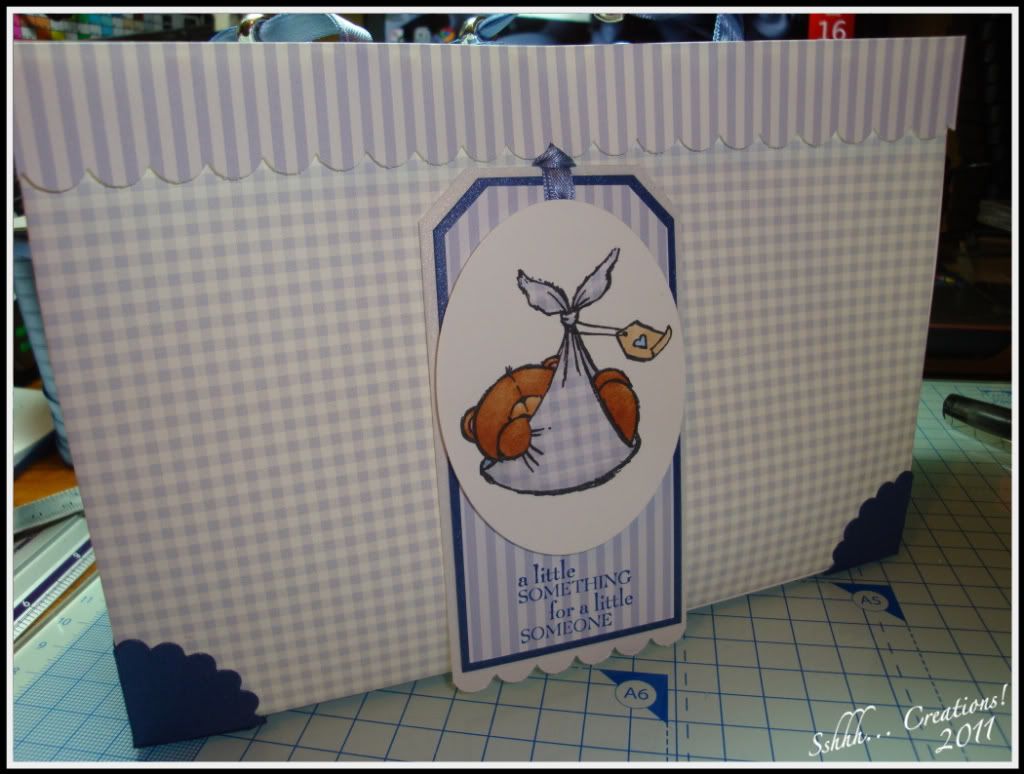
And the bag is finished!

Photobucket

Hopefully I haven't made it sound too complicated, a lot of it will make more sense when you're actually making it, they're easy enough to make.

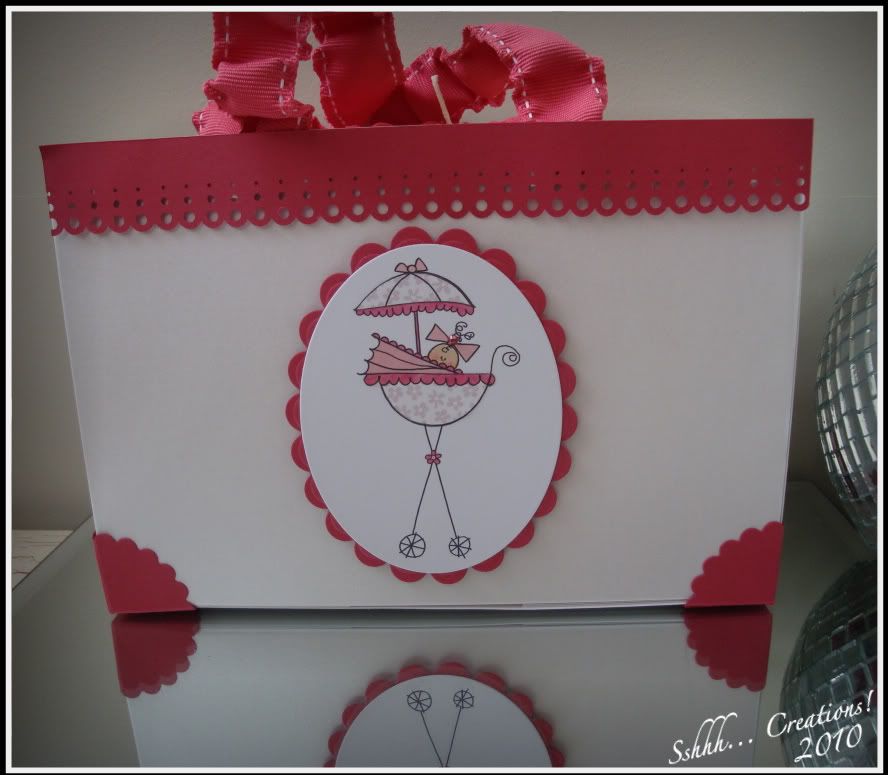
Here’s another one I made
Photobucket

They are big enough to fit 2 pillar candles standing up – and strong enough to carry them!

Thanks for dropping by!


Photobucket