Completely Crackers!

Saturday 31 December 2011

Hi everyone!
Now that the wedding is over and I'm still going to be on holiday for a few more days I thought I'd better get caught up on all the cards that I haven't had the time to blog over the past few months.
So, just to get them out of the way I thought I'd show the few Christmas cards that I made first - it won't take long, I didn't make very many!

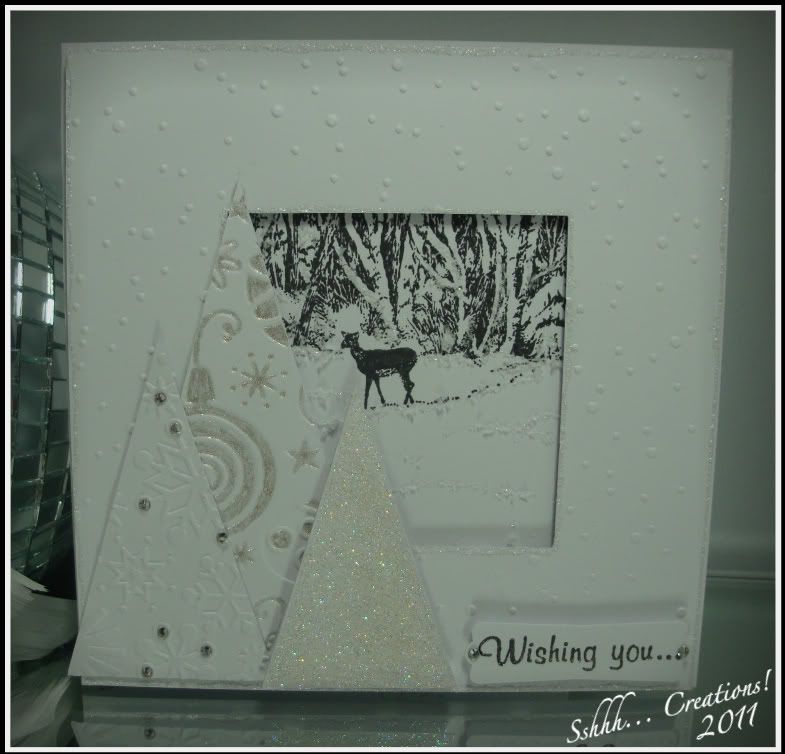
To start with here's the one (or two?) that I made for my wee niece and nephew.  I'll show you the rest in a couple of days.
I had the idea months ago but thought I wasn't going to have time to get it made before the big day, so I got stuck in and got it made quicker than I thought I would - I suppose that's what happens on the rare occasion that you know what you're doing and what you want! lol

Photobucket


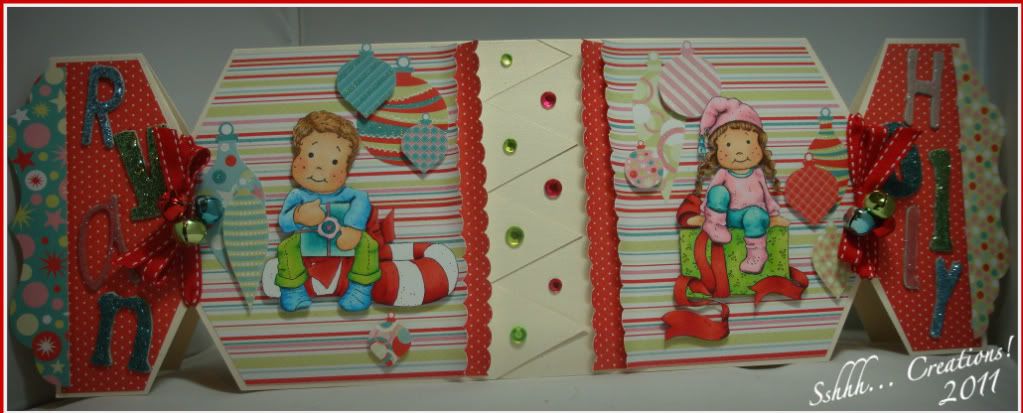
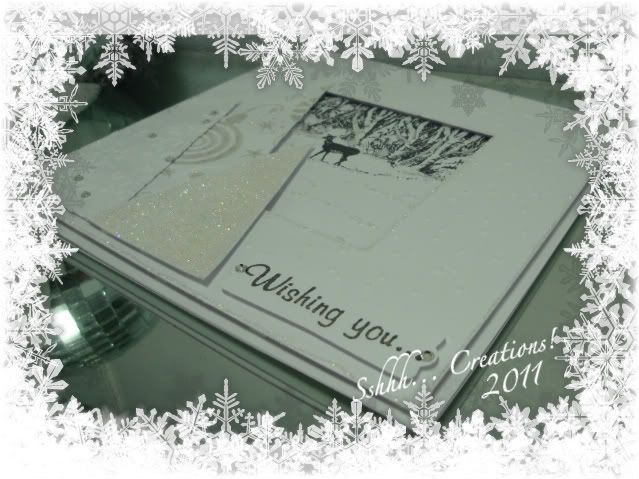
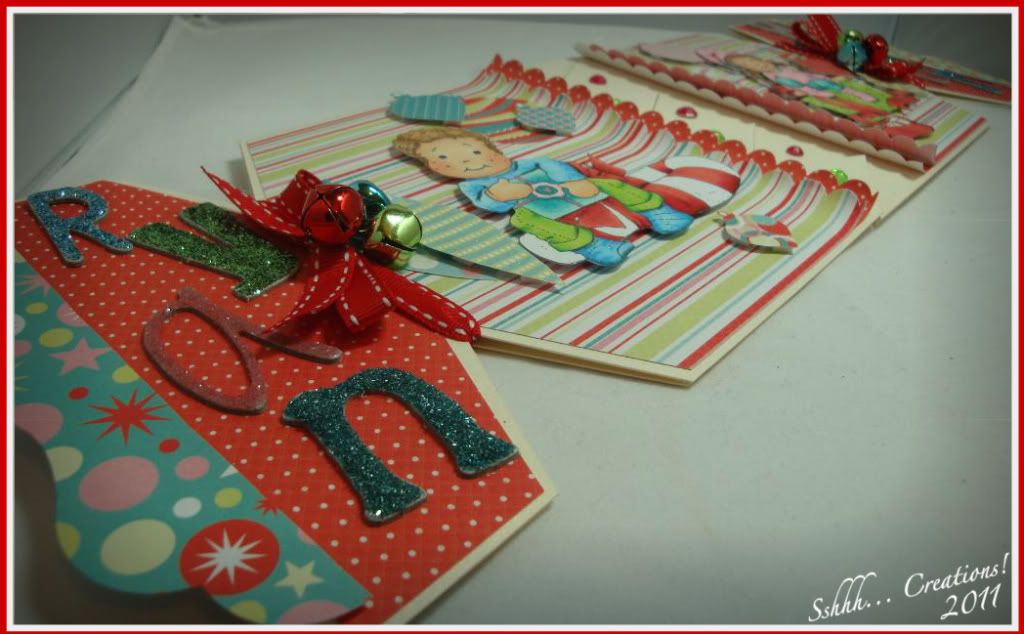
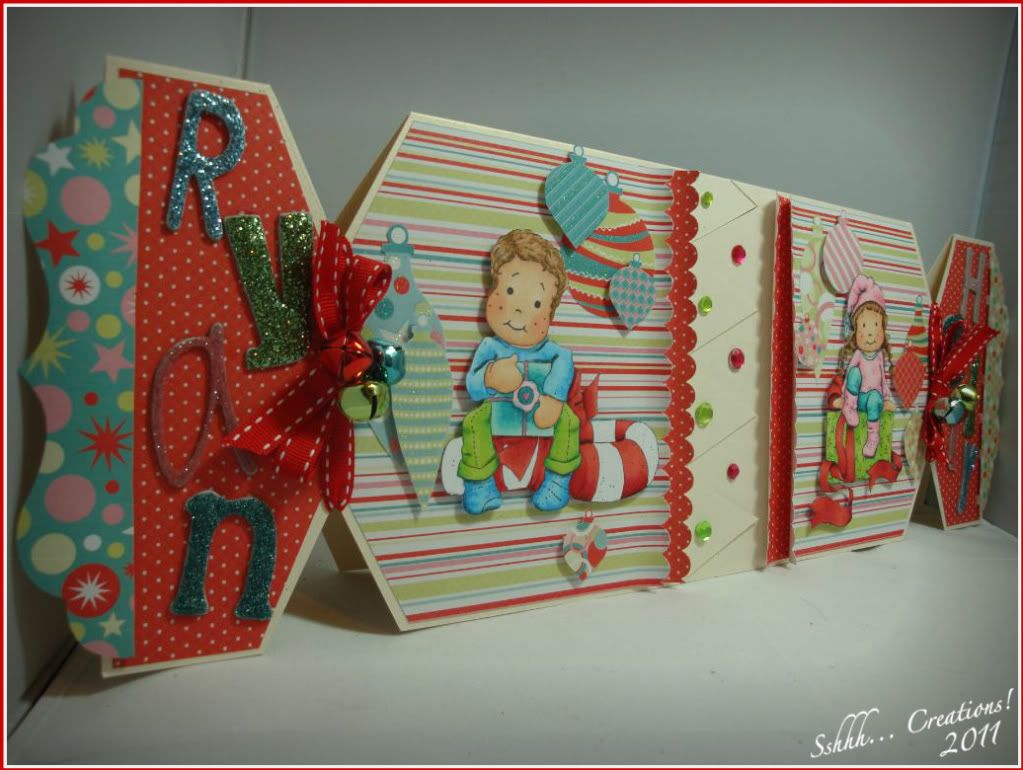
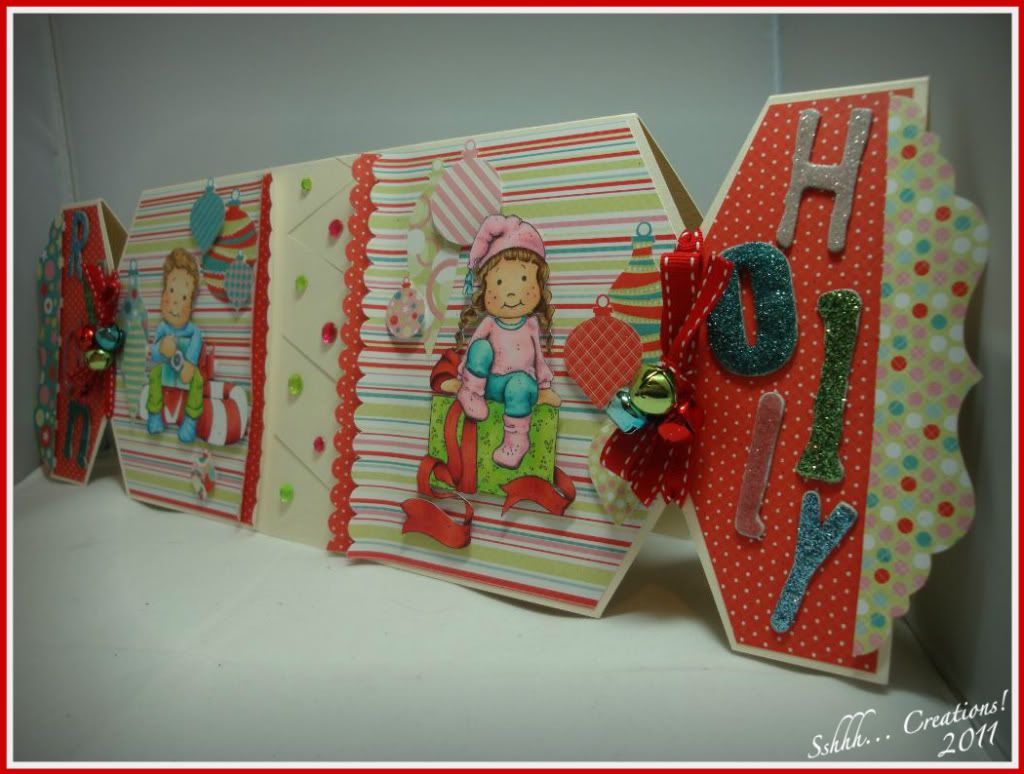
In the words of the great Frank Carson..."It's a cracker!"  I made it out of an A3 sheet of card and I measured and cut the zig-zig split but I didn't cut the points the whole way through at the back so it stayed together until it was opened and then they pulled it apart like a real cracker and each side was a separate card.

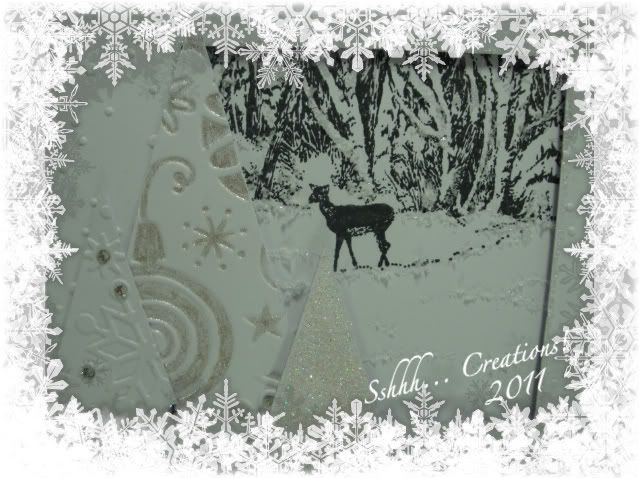
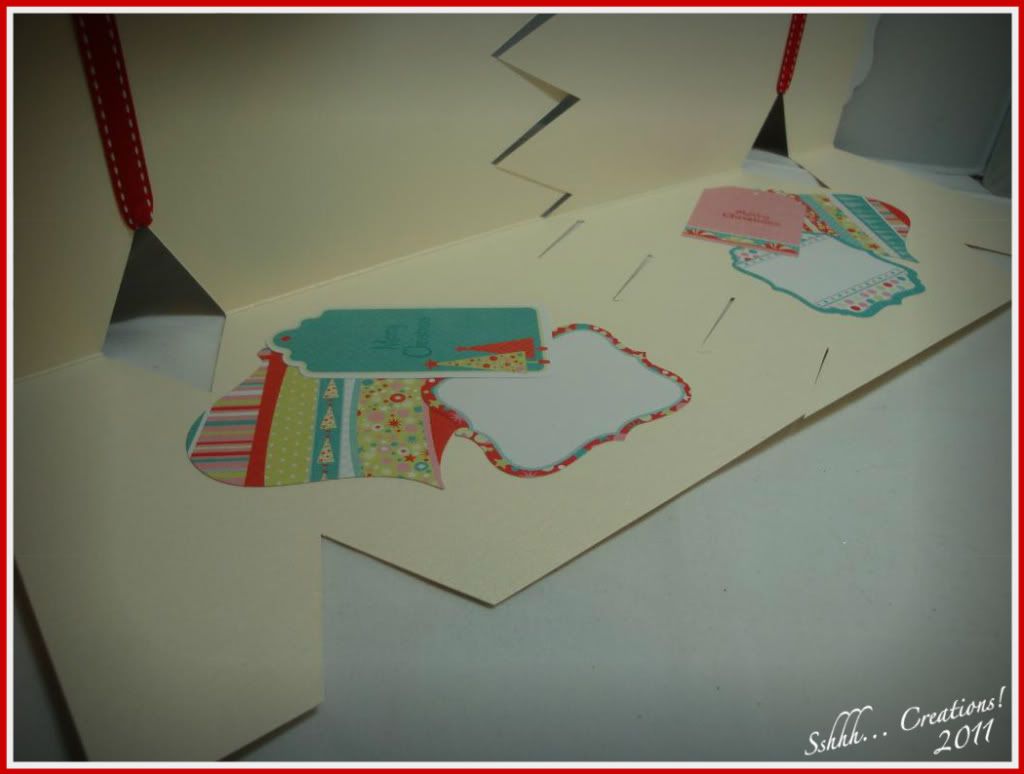
Here's what I did with the 2 separate cards

Photobucket


Photobucket


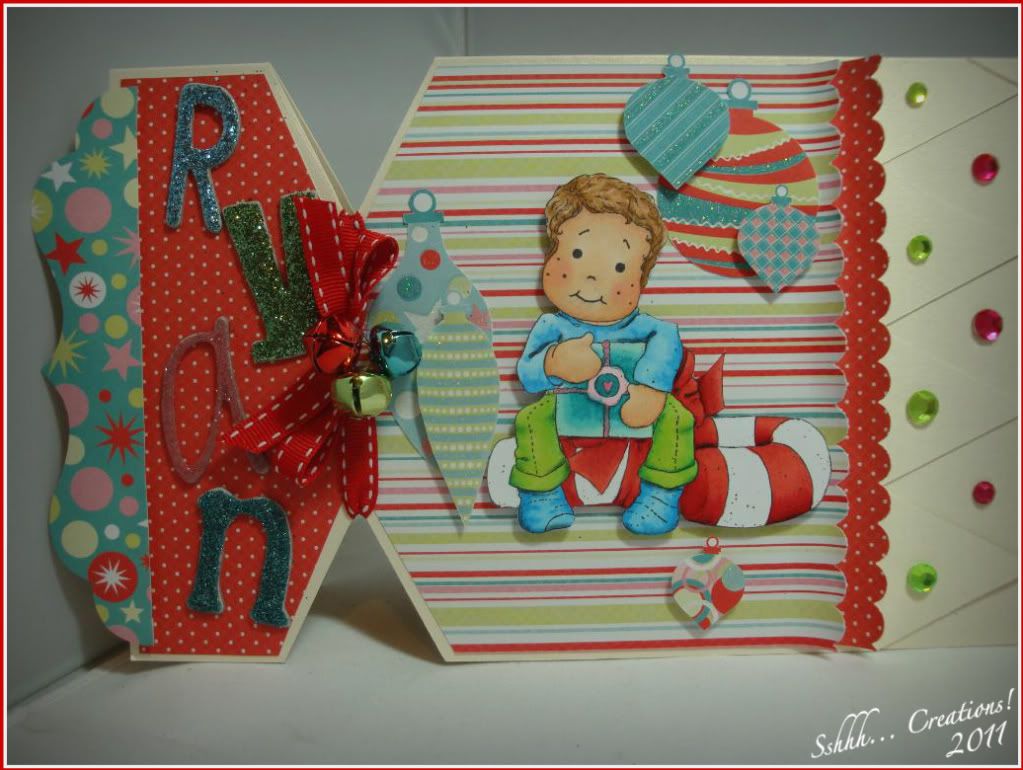
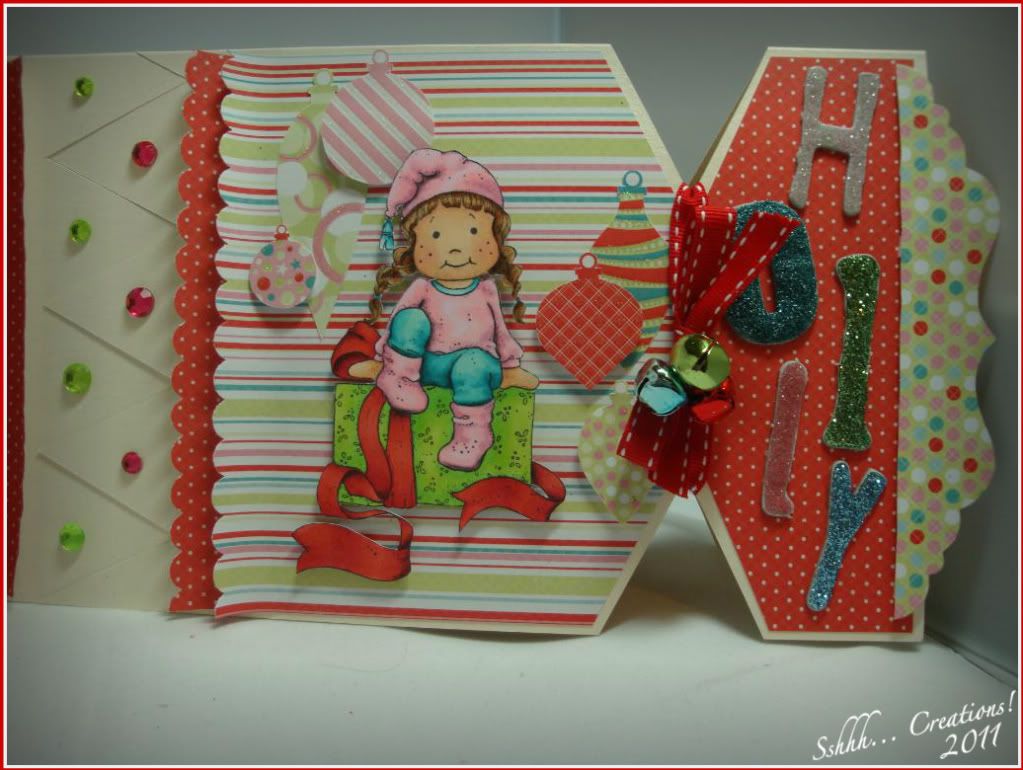
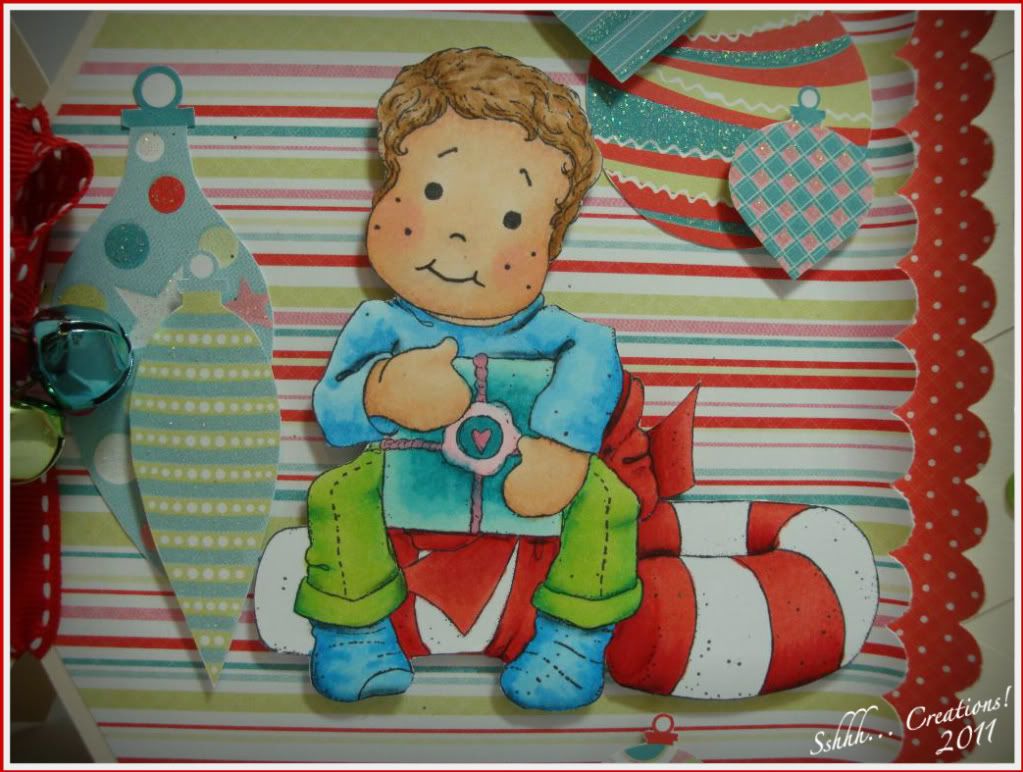
I used some Magnolia stamps - a mixture of new and old ones - and masked them off to stamp a seat under them.  I added facial features which I've never done before but I saw it on some other blogs and although I love Magnolia's as they are, I thought that for Ryan & Holly, they needed faces.  The one of Holly actually bears a slight resemblance to her! lol - she's so cute!
I coloured them with copics and cut them out.

Photobucket


Photobucket


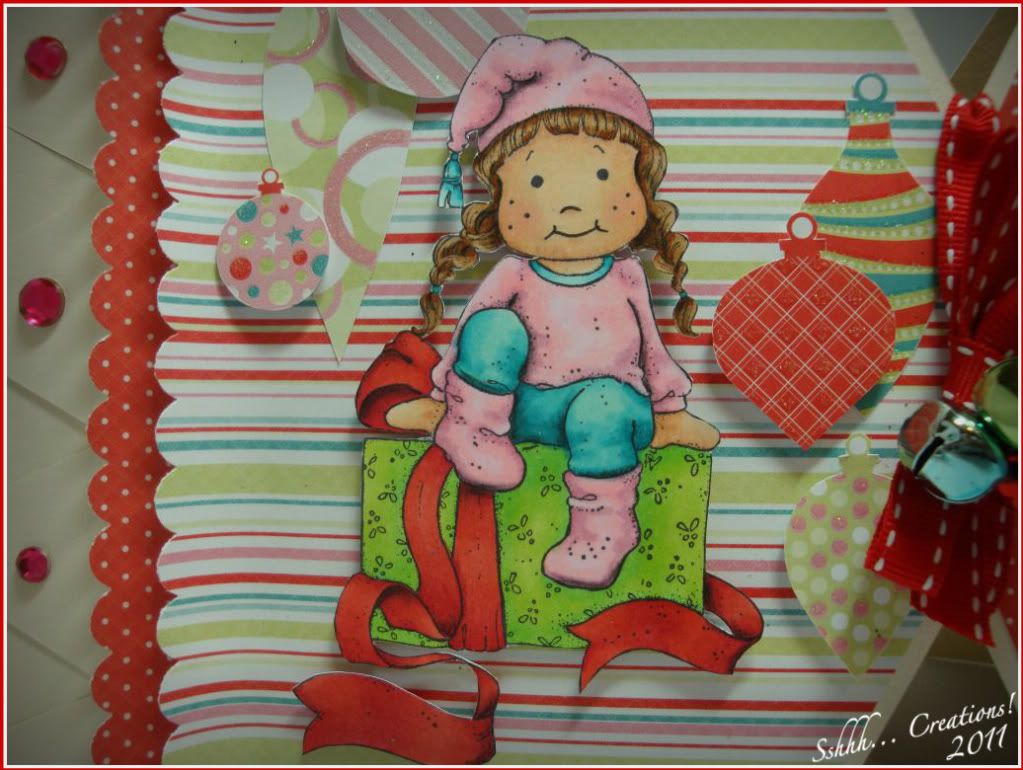
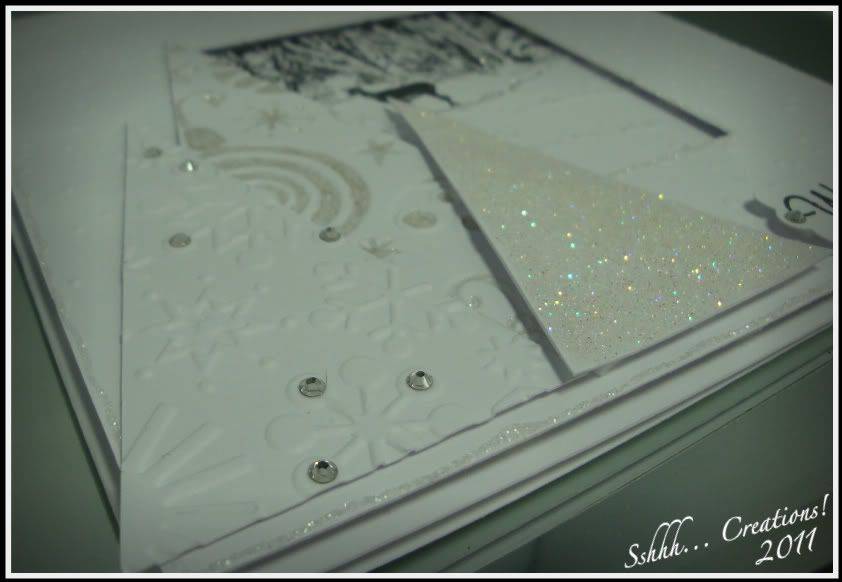
I used some Tim Holtz grunge-board die-cut letters and coated them with glossy accents and then smothered them with different coloured glitters.

Photobucket


Photobucket


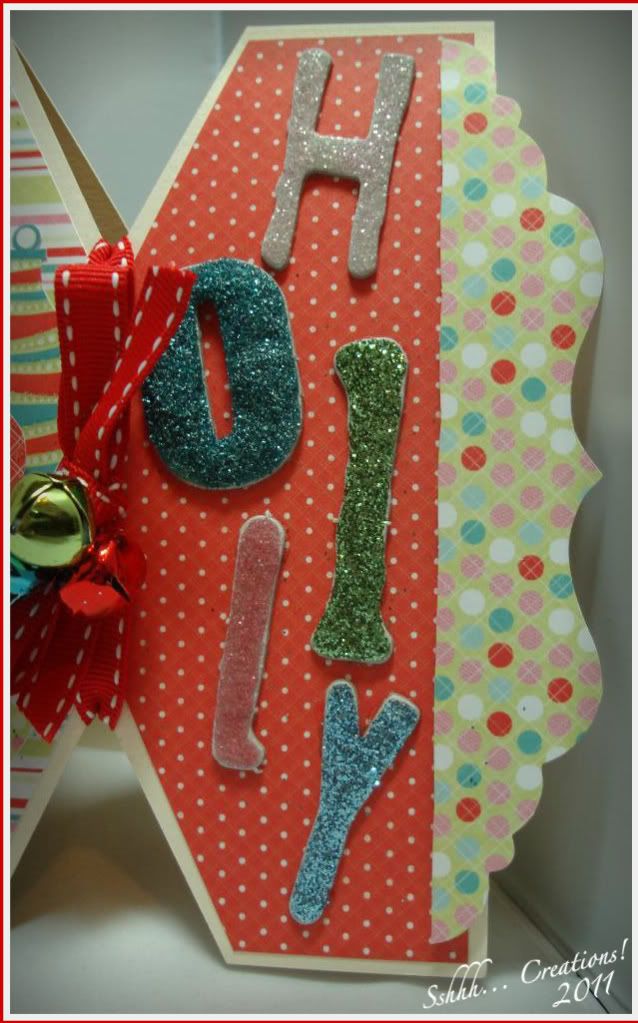
The papers are from the Christmas Carnival Collection from Kaisercraft.  I used a Stampin' Up! edge punch for the backing papers and curled them up from the split in the cracker.  I cut out some baubles and decorated around the figures and then I used a couple of the die-cuts from the back of the paper pad for the ends of the cracker.  A wee bit of ribbon and a few jingle bells finishes it off.

Photobucket


Photobucket


Photobucket


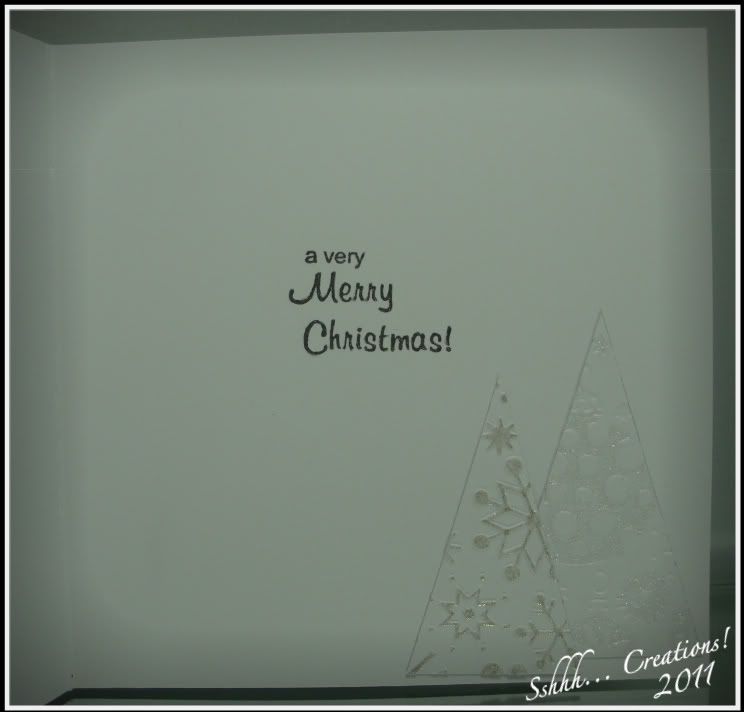
The inside is fairly plain due to time and the fact that it was hard to keep the card open to decorate it! lol

Photobucket


It was a fun card to make and the recipients had fun opening it so it all worked out ok!
Tip: I had to be imaginative with the envelope as I didn't have any to fit so I took 2 A5 envelopes and laid them side by side and slit down the 2 middle edges and stuck them together.

This card fits the following challenges (there's loads of them!):

4 Crafty Chicks; Something New (new style of card)
Bling It On; Christmas
Crafts & Me; Anything Goes
Creative Inspirations; Anything Goes
Daring Cardmakers; Spots & Stripes
Diva's By Design; Merry Christmas
Dream Valley Challenges; Christmas
My Mom's Craft Shop Challenges; Anything Goes
One Stop Craft Challenges; Winter Wishes
Paper Play Challenges; Christmas
Paper Sundae's; Celebrate
Saturday Challenge: Anything Goes
Simon Says; Anything Goes
Stamp, Scrap and Doodle Saturdays; Bells
Top Tip Tuesday; Anything Goes
Totally Gorjuss; Happy

So I'll take this oppurtunity to wish everyone a really happy new year.  I hope 2012 holds all you wish for and more!

See you next year with more catch-ups!

Thanks for looking! xx
 Photobucket

Wonderful Winter Wedding

Friday 30 December 2011

Hi everyone!  I hope you all had a fabulous Christmas and have something nice planned to see in the new year.
Our Christmas break is over and it's time for another challenge on the Alphabet Challenge Blog.  We're back to fortnightly now and the challenge for this fortnight is...

X for Xtra Special Occasion!

We're also running a DT call so make sure you put your name down as I can't wait to see who my new teamies are!

Here's my project for the challenge..

Photobucket


I made this for my cousin who got married yesterday and I made their wedding stationary.  As the theme for their stationary was winter themed I went with that for their card.  Here's a close-up of the card

Photobucket


The image is from Tiddly Inks called "Me and you baby" which I coloured with copics.  I then spread glossy accents all over her dress and gave it a coat of glamour dust so it really sparkles!

Photobucket


I didn't use any design papers on this one.  Instead I cut a spellbinders wonky rectangle out of a square of card and stamped a U-Mount stamp from the Funky Floral set around the edge of the card and heat embossed some super sparkle holograph embossing powder using Versamark.
I attached some acetate to the back of the card and then used some foam tape around the shape and the edge of the card.  I put some polar white flower soft and some glamour dust into the space left over the acetate and then attached it to the card blank - making a shaker card.  A wee tip - if you give the acetate a rub with your anti static bag for heat embossing before you add the filling it will stop the glitter sticking to the acetate!
I printed out the sentiments and cut them out and attached them along with the cut out image onto the front of the card.  Everything was distressed with some iced spruce distress ink.

Photobucket


I used the same swirly stamp and embossing powder on the inside of the card and used a sentiment from Lili of the Valley on the left hand side and a Stampin' Up! one on the right hand side.

Photobucket


I also decorated a candle for them but I forgot to take a photograph before I covered it over - you can just make out the decoration through the organza

Photobucket


And here's the whole candle

Photobucket


As I said, the wedding was yesterday and it was absolutely gorgeous!  It started off a bit wet but brightened up a bit in the afternoon.  A great day was had by all!

I'd like to enter this card in the following challenges:

By The Cute & Girly; Let it snow
Crafts & Me Challenges; Anything Goes
Crafty Boots Challenges; Celebrations
Creative Inspirations; Anything Goes
My Mum's Craft Shop Challenges; Anything Goes
Paper Sundae's; Celebrate
Saturday Challenge; Anything Goes
Simon Says; Anything Goes
Stampin' For The Weekend; Anything Goes
Sweet Pea Stampers; Make a Gift
Sweet Stampin; Sparkle & Bling
Top Tip Challenge; Anything Goes
Totally Gorjuss; For someone special

Thanks for stopping by - and make sure you take a look at the Alphabet Challenge Blog for details on the challenge and the DT call.
Photobucket

I'm a little late!

Friday 9 December 2011

Hi all!

I'm a little bit late posting this, time just runs away from you at this time of year!
But it's been another fortnight since the Alphabet Challenge Blog's last challenge.  We're up to W now and the challenge this time is...

W for White Christmas!

This challenge is running for 3 weeks to allow for a wee Christmas break, ahhh!

So here's my card:

Photobucket


I used an old stamp that I've had for a while and I can't remember who made it - I'll try to find out and add it later.

Photobucket


I cut a piece of card slightly smaller than the card base and measured and cut a square out of the centre.  I ran the frame through my Grand Calibur with the Cuttlebug snowflake embossing folder - I had to do this a couple of times to get it all over the frame as the frame was a bit bigger than the embossing folder.  I attached the stamped image to the back of the frame with foam pads to give it some dimension.  I was also able to make sure I positioned the image where I wanted it in the frame.  I then edged the frame with some Rock Candy Stickles.

Photobucket


I then made three triangle trees and decorated them all differently using different embossing folders and types of glitter.  I gave the smallest one a coat of glossy accents and sprinkled some glamour dust over it so there's a lovely sparkle off it!  I added some swarovski's to the middle sized one for a bit more bling.

Photobucket


The inside finishes off the CC Design sentiment from the front of the card and I've added a couple of triangle trees to correspond with the front.

Photobucket


So that's it.  Why don't you pop over to the Alphabet Challenge Blog to see the rest of the DT's projects and then share your makes with us there?!

Thanks for looking!
 Photobucket