Got My Wires Crossed

Tuesday, 15 December 2015

Hi Folks!

Why is the most wonderful time of the year so blimmin busy?!!  It's hard to get time to get everything done, I've barely even been home enough to do any of it, but I suppose that's one of the things that make it wonderful!

We have another challenge running for the next fortnight at the Alphabet Challenge Blog, and it is...

V for Vintage!

I decided to show off something a bit different this time, and I have used exactly zero amount of card!

I was going to a ball earlier in the year and my dress had a 1920's theme, so I thought I'd make myself some jewellery to go along with it.  I've only really just started making wire jewellery and this is one of the first things I made with it - and it has me hooked!


I made a dragonfly and turned it into a comb for my hair!


I got the idea from a Nicole Hanna Designs tutorial but I tweaked it a bit to make the body ridged, added the crystals and the comb.  I'll not go into how I made it though, as you will need to buy the tutorial if you want to have a go yourself.  But do go and look at her work, it is amazing and I hope to one day be half as good!


I was so surprised at how easy it was, first of all to make the piece following the tutorial but then to also tweak it to suit what I needed!


It was so easy and enjoyable that I made several variations!  Bare copper, tarnished/patinaed copper and silver.  I kept all the beads the same colour for comparing.  My dress was teal so this Swarovski rondel was perfect!


In the end I decided to go for the silver version as it matched my dress better.  I then promptly forgot to make the rest of the jewellery until the day of the ball so I knocked up a tiny pendant and matching earrings in about 20 minutes!

So that's my vintage-y thing!  I hope you can join us at the Alphabet Challenge Blog, I can't wait to see what you do!

Thanks for looking!
 Photobucket

Paix, Amour, La Mort, Métal

Monday, 23 November 2015

 Hello!

I'm a little (really, a lot!) late with my post as I got distracted.  Which happens a lot with me!
I was supposed to post this on the 13th, but I got distracted while watching the news of the terrible attacks in Paris.  I know there are attacks in different parts of the world every day, but we pretty much got to see this one play out on our screens as well as it being a bit closer to home.
I was also particularly shocked by the attack at the concert where the Eagles of Death Metal were playing, where so many young people were killed, hurt and mentally scarred.  They are a band I am a fan of and I am someone who loves going to rock concerts, so I felt a sort of affinity with them, if you know what I mean.
I've gotten to the stage where I just don't want to watch the news any more - it's just too sad.

Moving on to a lighter note.....

We have a challenge running at the moment on the Alphabet Challenge Blog and there are still a few days left to enter!  The challenge is up to T and the theme is...

T for Tis The Season!

Here's what I made


I made an extra large christmas card for my niece and nephew using an A3 piece of card.  I gave the card an inch wide spine and trimmed the rest to make a square card and made an enclosed aperture.  I used some Magnolia Doohickeys - the houses and Santa's Sleigh which I cut 6 of and stuck 2 sets of 3 together to make it really sturdy so as I could make the sleigh 3D by using another piece of card for the base of the sleigh.


I used snow-tex all around the inside edges of the aperture to give a really lovely texture and look.


 The papers I used are First Edition, Nordic Christmas.  I used my Stampin' Up! scallop edge punch to make the edge around the aperture and finished off the corners with a bit of red card die cut with a spellbinders scallop circle die and quartered.  Lot's of pearls and diamantes finish that off.  I used an X-Cut "Merry Christmas" die that was bling'd up a bit as well as an alphabet die set for the names.


The images are also both Magnolias.  I used Copics to colour them - skin; E21,13,00,0000,R20. Hair;E37,33,31,30. Clothes;R39,29,24.B95,93,91.YG97,95,93,91. Box;E27,25,23.


The inside has the same basic ingredients as the front.  For the corners of the back of the enclosed aperture I used 4 die-cut scalloped circles which I scored into quarters, then cut one of the scored lines from the edge to the centre of the circle and then overlapped two of the quarters to make a corner.  These also hide the hole that is left after making the aperture.


My sentiment insert was created by stamping the mini Magnolia stamp onto some card and then drawing a square (using a ruler) slightly askew, as if she is holding the card and then covering the square with a post-it note and stamping Magnolia snow flakes in different colours of ink around the edges.  The Sentiment stamp is also by Magnolia.


Here is a pic to show the spine of the card and how wide it has to be to accomodate the enclosed aperture.  You can also see some of the little wooden pieces that I stuck on the inside of the card and along the spine.


Obviously the card is too thick for a conventional envelope so I compromised and used a pizza box that I had received some papers in in the post and covered it with Christmas paper.  I didn't take a photo of that though.

So that's it, I hope you are able to join us at the Alphabet Challenge Blog for the last few days of the challenge!

I'd like to enter my card in the following challenges:

All Sorts Challenge Blog; At least 3 die cuts
Bunny Zoe's Crafts; Sparkle
Creative Inspirations Challenge Blog; Festive Fun
A Gem of a Challenge; Inspired by a Christmas song - It's beginning to look a lot like Christmas
Incy Wincy Designs; Tic Tac Toe - Pearls/Free/Use a die
Moving Along With The Times; My Favourite Things - Brown paper packages tied up with strings
My Time to Craft; Let it snow
Papertake Weekly; Let it snow
Quirky Crafts; Anything Christmas
Whimsy Stamps; Anything goes - Holidays

Thanks for looking!
 Photobucket

She Passed!

Friday, 16 October 2015

Hello Folks!

Another 4 weeks have been and gone in a flash!  The year will soon be away and I'm still struggling to remember to write 2015 instead of 2014!
My wee sister passed her driving test last Saturday.  She hadn't told us that she was doing it but I had an inkling :)  She was under pressure to pass it first time as we all passed on our first attempts (all being the siblings - there are 4 of us altogether, including Rachael).  She managed it so was quite excited and very happy!  She then drove her car up to Belfast on Sunday to Queens, where she goes to university.  She wasn't overly confident as it's a good bit away and involves motorway and lanes and round-abouts and lots of traffic - and she only passed her test the day before!  It also involves knowing the way, so mummy went with her, with daddy following to take mummy home again!  We'll see how she manages on the homeward journey.

We have another challenge for you this fortnight at the Alphabet Challenge Blog, and it was my turn to choose the theme, so I went for...

R for Ribbon!

I want to see lots of lovely ribbon on your makes, I'd really like to see some innovative ways of using ribbon, as well as beautiful bows and showing off pretty ones.

As I had a special occasion for a card this week, I had a specific theme, here's what I did:


I made this for Rachael and I started off by googling a map of our local area which I took a screen-shot of and turned it sepia in photoshop.  The other papers I used are American Crafts, Lucky Charm.


The image is Keys Please by Saturated Canary.  I coloured her with the following copics: Skin;E21,13,00,0000,R20. Hair;E4937,33,30. Top;Y26,23,21. Trousers;E29,27,25,23. Boots;RV34,32,21,10. Eyes;YG17,13. Certificate;E40.


The dies I used are: Die-Namics - Dainty Doily Duo (the small one), Magnolia swirl Doohickey, Memory Box - Simple Banner and Marianne Design die and matching stamp for the sentiment.
The flower is from The Works and the ribbons and charms are from my stash.

The inside is kept fairly simple and echoes the front.  I used another map of the local area which also got the sepia treatment.

So there you have it, I hope you can join us at the Alphabet Challenge Blog and show us what you can do with ribbon!

Thanks for looking!
 Photobucket

Seaside Scene

Friday, 18 September 2015

Hya folks!

I can't believe it's been 4 weeks since my last post - the days are just whizzing past!  It'll be no time until certain boxes will need to be hauled down out of the attic and the real work begins!
I'm trying to think what has happened in the last 4 weeks that I can blog about... oh yes, my cousin got married and it was such a lovely wedding!  It's a long time since I've been at a wedding that was so relaxed and happy, it really made the day enjoyable.  But I forgot to bring my camera with me so got no photo's, silly me :/

Anyway, it's time for another challenge at the Alphabet Challenge Blog!  We're up to the letter P and my dear teamie Mari chose...

P for Pelican, Peacock or other birds!

What a fab challenge!  And I even have stamps of both a Pelican and a Peacock!  The "other birds" bit is just incase you don't have anything with Pelicans or Peacocks.  I'd love to see how many other birds people can come up with that also start with P!  Penguin, Parrot, Pigeon & Parakeet are all I can think of off the top of my head. (I don't thing Polly would count!)

I had a good hoke through my stamps until I found my Pelican and here's what I made:


I used 3 Magnolia stamps on my card, Edwin, the Pelican and the porthole.  I used the following Copics: Skin;E21,13,00,0000,R20. Hair, sails, bill;E44,Y23,21. Shoes, collar, hat, sea; B39,37,34,06. Sky'B91. Log, boat;E49,47,44,43,42. Suit, Pelican, clouds, frame;N5,3,1. And the blender.  I also added some Gellyroll clear and gold pen to highlight.


I drew the log that the Pelican is sitting on, cos I wanted it to be anchored on something.  This is why I love stamps - cos I love colouring but I cannot draw to save my life!!


I'm not totally happy with the way I coloured the sea.  I wanted to use the same blues that I had used on Edwins' collar etc, but it was a bit dark.  I added clear Sakura Gellyroll pen on the waves which has helped to tone it down in real life, but of course, the glitter doesn't show in the photo!  I'm so surprised that you can't see any glitter in the photo, cos there is loads of it!


The paper on the back that looks like wood panelling is from a stack called Old Treasures (I can't see anywhere on the pack who makes it).
For the sea I used some plain blue cardstock, cut it to size and spritzed it with lot's of water on both sides, then I scrunched it up into a ball and opened it out again.  It's amazing how much water it soaks up, cos I had to add a little more to get it to scrunch again to an amount I was happy with.  I then flattened it out and while it was still damp I tore away some paper along the top edge.  I used the bit I tore away as the back "layer" of the sea and turned the corresponding bit over to layer over it.  I then added another layer and scrunched up the top edges a bit to be a bit more wavy looking.
The front layer of the card is sandpaper, cut to size and torn across the top.
You can see the layers of the scene better in the side view, even if it is blurry!


The dies used are: Memory Box "Simple Banner", and 2 Doohickeys (the shell and the anchor) from the club magazine (volume 1).  I added some colour to all of the diecuts with Copics.  The "seaweed" is from a really old punch that I have and the "rope" is a little string of hessian knotted up and I added the crab charm with a star shaped brad which I coloured gold (and sealed with clear nail polish) in a failed attempt to make it look like a starfish!


The Eagle Eyed amongst you will have noticed in my blurry side view pic that the back panel in sitting up nice and straight with no apparent support.  It is, in fact, well supported with a nifty picture frame type stand that I fashioned out of a spare piece of card.  I even cut out the wee fold down notch to keep the leg sticking out!


And that is my card.  I do hope you can join us at the Alphabet Challenge Blog, but don't go making yourself all a Puffin! ;P

I'd like to enter my card into the following challenges:

4 Crafty Chicks; Circles, circles, circles. (the porthole)
Create & Inspire; Anything goes
Aurora Wings; Anything with wings (the pelican)
Fab N Funky; Recycle/Upcycle (I upcycled some sandpaper)
A Gem Of A Challenge; Boys, boys, boys
The Paper Shelter: A card with many folds
Papertake Weekly; Animal Magic (a pelican and a crab)
Quirky Crafts: Animal Magic (a pelican and a crab)
Southern Girls Challenge; Layer it up
Sweet Stampin'; Make a scene

Thanks for looking!
 Photobucket

No Ordinary Anniversary!

Friday, 21 August 2015

Hi all :)

I had a lovely holiday away with my folks and sister - first time away with them in over a decade! We were in a lovely part of Germany called Ruhpolding, away up in the Alps!  We had a bit of a hairy landing as we arrived just in the middle of a thunder storm and it was quite turbulent!  Just as the wheels of the plane were about to hit the runway, the plane took a bit of a dive to the right - I could see that the wing must've been only inches from hitting the ground!  Thankfully the pilot managed to straighten up and we lived to tell the tale, but it was scary biscuits!  We then weren't allowed to disembark the plane until the storm passed as the ground crew weren't allowed out during it!
Ruhpolding is in the south of the country so we were able to spend a day in each of Munich (Germany) and Salzburg (Austria) - I absolutely loved Salzburg, such a beautiful city and it seemed really relaxed there.  It helped with the atmosphere that there was a "Busker" playing classical music in the middle of Mozart Square, and he was brilliant!  Loved it!  We also went to The Eagles Nest, even higher up in the Alps which is where Hitler used as a retreat and for entertaining visitors.  It was amazing up there too, even though it is very much a tourist attraction now, you still get an eerie vibe of the history of the place.  The views are spectacular though!

Anyway, it's that time again when we get to use another letter of the alphabet to challenge you through the power of The Alphabet Challenge Blog!  We're up to N already and the theme for the next 2 weeks is...

N for No Patterned/Designer Paper!

Great challenge as I love my papers!
We also have a DT call at the moment - until the 30th, so make sure you check that out and get your name in as it's a lovely place to be!

Here's my card:

I was asked to make a card for a priest who is a friend of the family and was about to celebrate the 25th anniversary of his ordination.  I must admit that I felt a bit stumped!  What do you do for a priest?!!  I'm not a religious person at all, so I'm not up on bible quotes etc, but I do have a few stamps that could be classed as "Holy"!  So I got stuck in!
I decided that a black and white colour theme was the way to go and just used some plain black pearl card which I layered up onto a white and another black layer, which then went onto the white card base.  I made a square in Microsoft Powerpoint the same size as the top black layer would be and typed out and positioned the text where I wanted it.  I then printed it directly onto the black card - the fact that the card is pearlescent is important as it means the ink takes a while to dry and you therefore have time to use embossing powder on it!  You do still need to work quickly though!  You also need to make sure you use an embossing buddy over the card before you put it through the printer as white embossing powder on fingerprints on black card is not a good look!  After I heated it and allowed it to cool, I cut it to size and layerd it up.


I used a cross stamp from a Stampin' Up! set that I have called "Special Blessings" along with the same white detail embossing powder that I used for the printed sentiment onto black card.  Again, I layered the cross onto white card before adding it to the card base.


I used stamps from the same set as the cross for the sentiment on the inside and kept it really simple with just black and white card.


I die cut a couple of 2's and 5's for the front using Memory Box's "Typewriter Number" die set.  I also couldn't resist adding a few diamante's here and there!

I hope you can join us at the Alphabet Challenge Blog and don't forget to enter for the DT call!

Thanks for looking!
Photobucket

Rock Out At A Christening!

Friday, 24 July 2015

 Hi everyone, I hope!

I'm off on holidays at the moment and I thought I wasn't going to be able to get this posted as my internet/computer are doing my head in!  I'm not sure what the problem is but most of the time, when I log on, the browser won't open any pages for me.  The computer seems to be doing updates and things OK so I don't know what the problem is.  I tried 3 different browsers and they were all the same.  I had just about given up but decided to check one more time and it seems to be working now.  Typical when it's now 11:30pm, I'm heading off first thing in the morning, and I still need to pack!
So, owing to that, this scheduled post is going to be short and sweet!

We have a new challenge at the Alphabet Challenge Blog today and it is...

L for Lavender!

What do you do when your Rocker brother is having his son christened?  You make a Metallica themed Christening card of course!  Here's what I did:


I actually made this card a while back and for the life of me, I don't know what I did with the details for it, but I suppose that's a good thing as I haven't got time to write them out now! lol!
I know the image is by Mo's Digital Pencil and I coloured him with copics.

The papers are by Pink Petticoat, again, I'm not sure which colour pack they're from.  They look kinda blue til you see the blue guitar beside it, then they look kinda lavender!  I think they look blue-er in the photo's too :/
I used a selection of Spellbinder dies and some fonts that I got for free from the net.  I particularly like the Metallica font that I used to spell Noah!  I added a little cross cos it's a christening card, ie: it's holy and also in homage to the Master Of Puppets album by Metallica!


The inside just features some of the same papers as the front and a LOTV sentiment stamp.


That's my card, I hope you liked it!  I hope you can join us at the Alphabet Challenge Blog for this challenge sometime in the next couple of weeks!

Thanks for looking!
 Photobucket

He Liked It So He Put A Ring On It!

Thursday, 2 July 2015

 Hi everyone!

I've had to redo my post as it was scheduled to go last Friday, it didn't happen and when I tried to fix it I somehow managed to delete it :(  I think I'm out of practice with Blogger!
I'm also running out of patience tonight!  I think I'm too hot, even if I am in Ireland!
I've been having a lot of trouble getting online over the past number of weeks (which isn't helping with the patience!) so I apologies for being a bit behind on my commenting - I will get caught up!

We started a new challenge at The Alphabet Challenge Blog (when this post was originally supposed to go live!) and it still has a week to run.  We're up to J and the challenge is...

J for Jewels

I made this card for my cousin when she got engaged - this is the couple I went to Australia with in 2012, they were just a brand new couple then!  So I wanted to make a special card for them to celebrate.  Here's what I did...


This is a large easel card at 8x8 inches.  I always find it hard to fill in the spaces on larger cards. I think it looks a bit bare in the photos, but it somehow looked better in real life.


I've lost my wee info sheet of what I used but I'll try to remember.  I used 2 of my Go Kreate XL circle dies to make the "ring" and I deliberately put the smaller one off centre to give an illusion of depth.  I used papers from a 12x12 American Crafts paper pad called Lucky Charm which I inked around and stamped with some accents stamps (sorry, I don't know who makes them) I also sprinkled some frantage powder over it before heating it up.  The base is covered with a paper that I had for forever and have no idea where it came from!  It is almost like fabric and has lots of glitter and texture on it.  The sentiment is computer generated using the font named Take A Pebble.  I then added a Doohickey swirl cut from peach glitter card.


 For the Jewels I used 3 Bevelled Window Panes from Stampin Up, 2 small and 1 large.  On the 2 smaller ones, I coated the under-side with glossy accents and then applied the fabric like paper and left to dry fully.  For the larger one I measured the dimension inside the bevelled part and printed out a photo of the happy couple - actually taken on the night they got engaged and used to announce the news! - to the same size.  I stuck it to the middle of the pane before adding the fabric paper and leaving to dry.  Once dry I then trimmed the excess paper from the edges and arranged on the card Ring base to (hopefully) resemble an engagement ring!  It was mighty hard, in fact impossible!, to get a good photo of the jewels.


The base was made using the same dies as before plus a Spellbinders circle die and an inverted scalloped circle die, raised on foam pads to act as the stopper for the easel.  The same font as before was used for the computer generated sentiment and lots and lots of gems were added.


I also added a small pocket to the inside where a gift could be inserted.


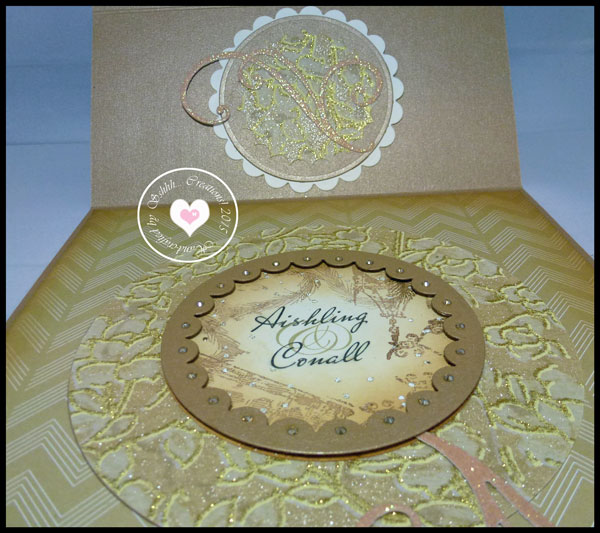
I was actually away over the weekend at Aishling's hen party, a merry night was had by everyone!

That's my card, I do hope you can join us at the Alphabet Challenge Blog for the rest of the challenge.

I'd like to enter my card in the following challenges:

Create & Inspire: Anything Goes
Craft Your Passion: Anything Goes
Creative Fingers: Anything Goes
Creative Inspirations: Anything Goes + Sketch
Fussy & Fancy: Fancy folds
ABC Challenges: M for Magnolia - Magnolia swirl die used
Corrosive Challenges: Leave a little sparkle

Thanks for looking!
 Photobucket